

Office Button
Microsoft Office or MS Office Suite is an all-in-one package of several programs that help us perform most office-related tasks, such as creating documents, spreadsheets, presentations, databases, etc. Some of the essential software programs of MS Office Suite include MS Word, MS Excel, PowerPoint, etc. To make all these software user-friendly and effective, Microsoft tries to make the user interface similar for the common options, allowing users to find commands and tools with ease. Office button is one such common option in all the software of MS Office Suite 2007.
In this article, we are discussing the Microsoft Office button (also called the Office button). The article also concludes the function of the office button along with the options listed under it.
What is an Office Button?
The office button is an essential element of Microsoft Office Suite 2007. This button was introduced in Office 2007 with the new Ribbon feature. When we click on the Office button, it displays some useful options which are used very frequently. Specifically, the Office button provides us options to open, save, print any document, or perform other common functions. Additionally, the office button allows us to configure the preferences or settings of the particular Office product.
The office button found in MS Office 2007 products looks like this:
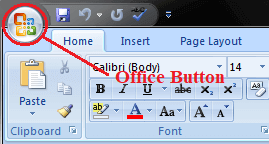
Where is Office Button found?
The office button is located on the top-left corner of Office 2007 programs, namely Excel, Word, PowerPoint, etc. The button is attached with the ribbon and is identified by a circle containing an Office logo inside it.

Office Button Menu Options
The following options or commands are displayed when we click on the Office button:
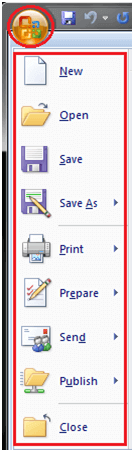
- New: This option allows us to create a new, blank file in the corresponding Office program, such as MS Word, MS Excel, PowerPoint, etc.
- Open: This option allows us to open an existing file from the local storage on our computer.
- Save: This option allows us to permanently save a temporary file to our computer after finishing the work. Additionally, we can save the changes to the current file using this command.
- Save As: This option allows us to save a copy of the active file with the desired file name and file extension to a desired location on the computer storage.
- Print: This option allows us to take a hard copy of the desired document on paper through a printer. Alternately, the print option can help us save a copy of the active document to a PDF format.
- Prepare: This option allows us to prepare the active file for distribution. In particular, the prepare option helps us view and modify the document properties accordingly. Furthermore, we can also inspect the hidden metadata of a specific file using this option.
- Send: This option enables us to send or share the desired files directly through the opened Office program with others. In particular, we may share active documents by e-mail, upload them to OneDrive, or post to a specific blog. The send option is renamed as ‘Save and Send’ in Office Suite 2010.
- Publish: This option enables us to distribute the desired document to people. We can even create a specific blog article with the content inside the file.
- Close: This option helps us to close an active document in a corresponding Office program.
Note: The Office button has been removed in Office Suite 2010 and later. However, the menu options still exist and are moved under the ‘File’ tab.


