How To Create Household Budget In Excel
First Step: Start up the Excel program as it opens up a blank spreadsheet. This is done by clicking the Excel icon in your computer (located on your desktop or your start-up page)
Second Step: You need to input data to help you calculate the figures for the budget. Since we are talking about budget here, you will need to put in figures for “expenditure” and “income”. Usually, Excel will total up the expenditure and income for you.
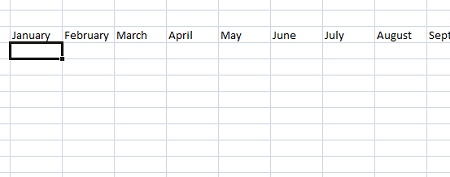
Third Step: You need to input the months for which you want to make the budget. Begin by typing each month (in the example below we begin from January) on a separate cell in the spreadsheet as shown below.
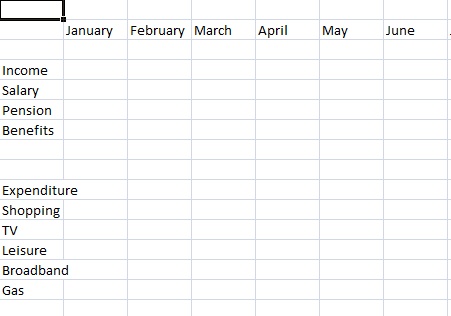
Fourth Step: Next, add heading and subheading for the income and below it, such as benefits, pension, salary, depending on the type of income received. The next thing to do is to include the expenditure column in the same column you typed the income. The names on this column will depend on the things you and your household spend your money on. This may be on utility, TV license, mortgage payments, leisure, shopping, gas, broadband, insurance, etc. See example below.
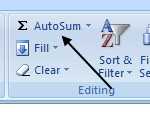
Sixth Step: After creating the heading and subheadings for income and expenditure, the next step is to input your calculations. This is important to enable Excel automatically add the totals whenever you put in figures. Click on the proper cell you want to input the figures and click AUTOSUM in the menu ribbon.
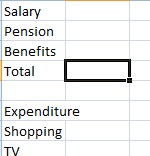
Seventh Step: Place your cursor and scroll over the area you want to include in the total. This should highlight the cells. When this is done, click the ENTER key.
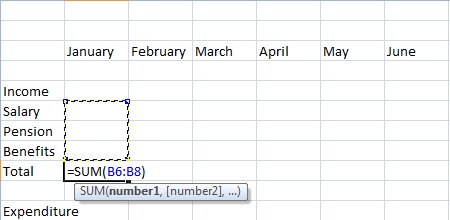
After the formula has been automatically placed on the first cell, it can hen be copied and pasted on all other cells that requires the same formula for computation.
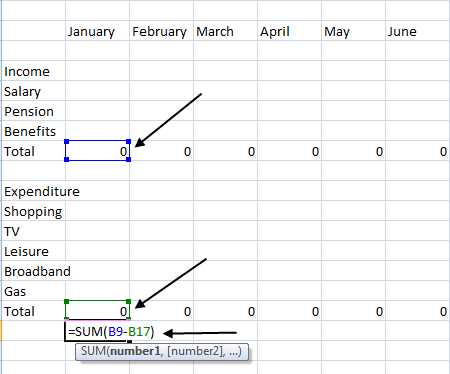
Eight Step: You have to go over the two steps again to fill up the expenditure column with the right computation. After this is done, determine the difference between your income and expenses. You can do this by clicking on the particular cell you want to view its total. Locate the AUTOSUM again and click the first figure that should be included in the calculation. In this guide, the first figure is the income total. In your keyboard, press the minus button. Then press the control key and select the second number (which should be the expenditure total) while holding the control key. To finish the calculation, click the ENTER key on your keyboard. Here is an illustration below:
Final Step: After including the calculations, the next thing is to add figures for income (inflows) and expenditure (outflows), and Excel will sum up the totals. Also, you can add formatting options such as italic or bold to make the budget spreadsheet more attractive and clearer. If you follow the above steps clearly, your Excel spreadsheet for your household budget will look like this:
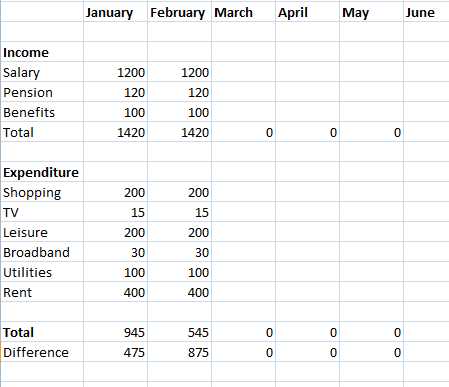
As you enter a new month, all you need to do is type in the income and expenses figures for the new month and the Excel program will automatically sum up the total for you.
Template
Further reading:
Basic concepts
Getting started with Excel
Cell References


