

Excel Save As Shortcut
The use of the ‘Save As’ command is widespread in Excel, and therefore, we can cut the time to increase the speed of the process to some extent by using the ‘Save As’ shortcuts. So, it is essential to know the Excel ‘Save As’ shortcuts and increase Excel’s overall productivity.
This article discusses some methods to understand how we can use ‘Save As’ shortcuts in Excel. We are using MS Excel 2013 during this tutorial to discuss the methods. However, the methods are the same for the other versions of Excel too. Before we discuss methods, let us discuss the function of the ‘Save As’ command and how it is different from the ‘Save’ command:
‘Save’ and ‘Save As’
Like the ‘Save’ command, the ‘Save As’ command also belongs to the ‘File’ section of Excel. Both commands are important because they allow us to save data created in Excel. However, there is little difference between these commands. Once the file is saved, applying the ‘Save’ command will save the changes in the same file. However, the ‘Save As’ command creates a new file with the changes and allows us to choose a specific filename and a location every time. More specifically, we can save changes to the new file even after working on the original file with the ‘Save As’ command and keep the original file intact from the changes.
In particular, both of these commands (i.e., ‘Save’ and ‘Save As’) help us save the temporary data we have in Excel to an Excel file. Without these commands, we would lose data added to Excel after the file was closed. Apart from this, the ‘Save As’ command offers more options and functionalities than the traditional ‘Save’ command in Excel. For instance, we can choose a new name, name extension, location, and many more.
‘Save As’ Shortcuts in Excel
There are four significant ways of using the ‘Save As’ shortcut in Excel, i.e.:
- By using the Excel Keyboard Shortcut
- By using the ‘Save As’ Shortcut from the Quick Access Toolbar
- By using the ‘Save As’ Shortcut from the Ribbon
- By using the VBA (Visual Basic for Applications)
Let us discuss each method in detail:
By using the Excel Keyboard Shortcut
Using the keyboard shortcut key for performing the ‘Save As’ task is the easiest and the fastest method. Since the ‘Save As’ function creates a new copy of the file, we must ensure no more changes are left to be made. Once we are done making changes to the file and want to save a copy of it in a specific folder with a specific extension, we can press the ‘F12‘ key from the keyboard, and it will quickly launch the ‘Save As’ dialog.
Note: It is important to note that ‘F12’ is a function key, and we may first need to activate the function keys by pressing the ‘Fn’ key from the keyboard. For some keyboards, this may not be necessary.
Let us use this method practically:
Suppose the manager has shared an Excel file with us for further corrections, suggestions, or improvements. In this case, we shouldn’t disturb/ alter the original file. So, if we have something to add to the file, we can make changes to the file and then save it using the ‘Save As’ keyboard shortcut.
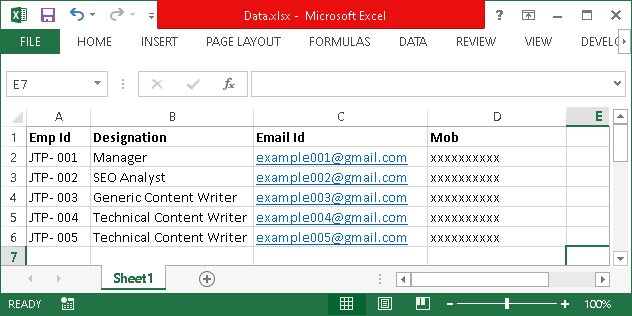
- First, we need to open an Excel file and make changes to it accordingly. After making the necessary changes, we must ensure that no other correction is left to be performed in the file. For instance, we have the file (Data.xlsx) with the following data:

- To save the data to a new file, we need to press the Excel keyboard shortcut key ‘F12‘ to launch the ‘Save As’ dialog quickly. It looks like the following image:
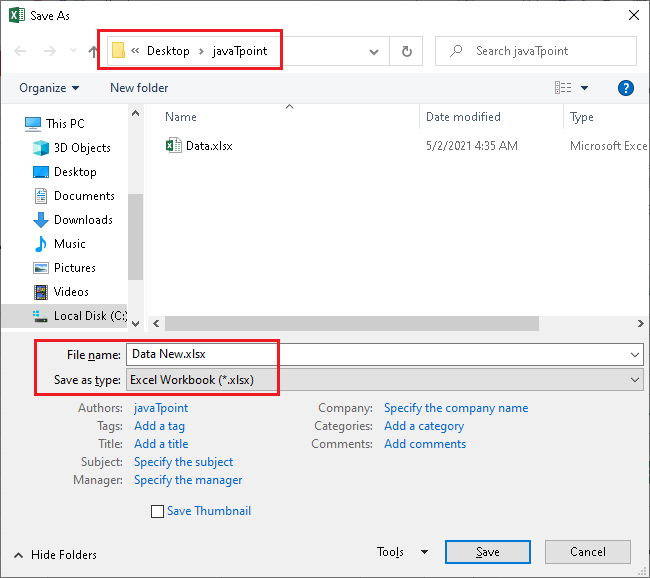
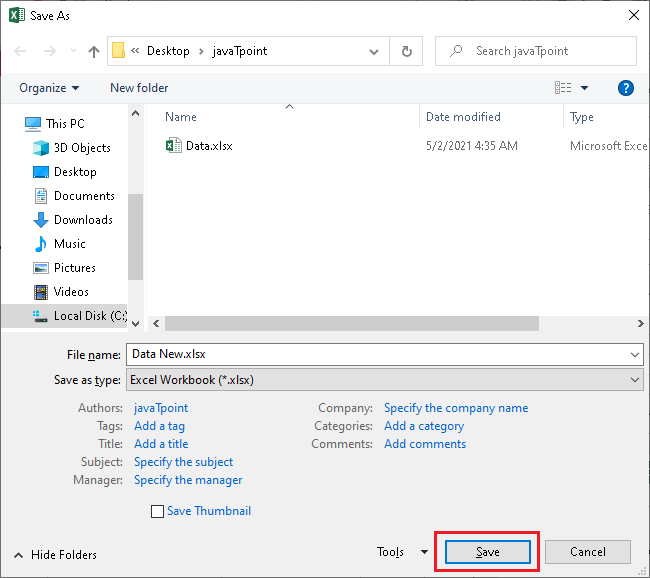
Here, we must enter the file name and select the location to save the file. Additionally, we can choose the file type using the drop-down menu next to the text ‘Save as type’. In our case, we select the filename ‘Data New.xlsx’ and choose the exact location to save the file as the original one. - Once we have entered the corresponding data, we must click on the ‘Save’ button.
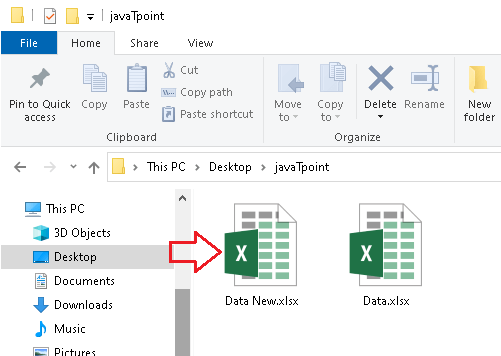
After that, a new file will be created with the applied changes without altering the original file’s data.
By using the ‘Save As’ Shortcut from the Quick Access Toolbar
Another method includes the shortcut of the ‘Save As’ command directly from the ‘Quick Access Toolbar’. However, we must configure the setup before we can start using it. We need to follow the steps discussed below to configure the setup and further use the shortcut:
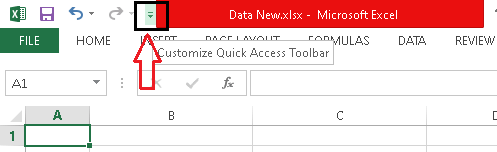
- First of all, we must click on the drop-down button, as shown in the following image:
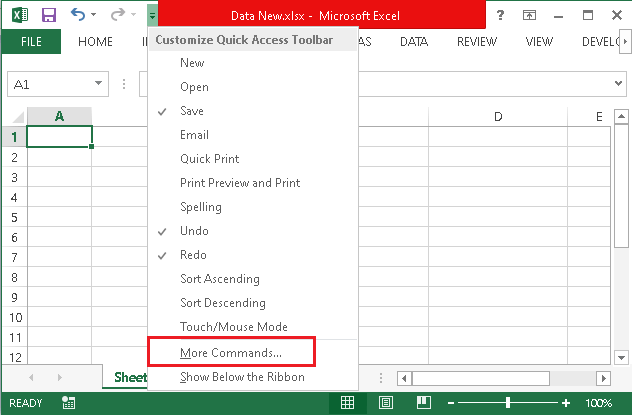
- Next, we must click on the ‘More Commands‘ option from the list.
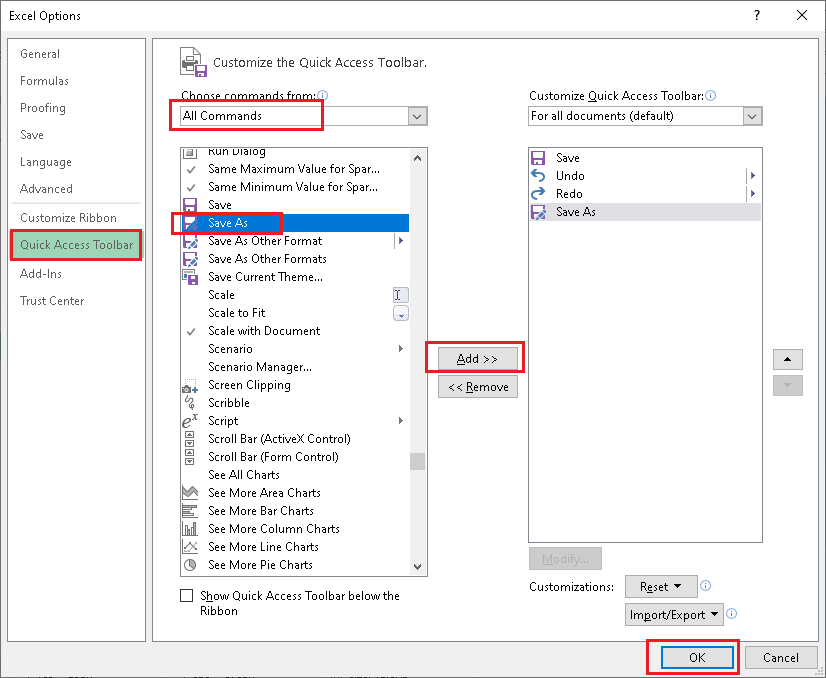
- On the next screen, we need to choose the ‘All Commands‘ from the drop-down menu and then choose the ‘Save As‘ option. Additionally, we must click on the ‘Add‘ button and then the ‘OK‘ button.
- After completing the previous step, a new shortcut will be added onto the ‘Quick Access Toolbar’, which looks like this:

Every time we want to use the ‘Save As’ command, we can use this shortcut from the toolbar, and the ‘Save As’ dialog will be quickly launched.
By using the ‘Save As’ Shortcut from the Ribbon
Another method includes the shortcut of the ‘Save As’ command directly from the Ribbon. Like the above method, we must configure the shortcut on Ribbon before we can start using it. We need to follow the steps discussed below to configure the ‘Save As’ shortcut and further use it:
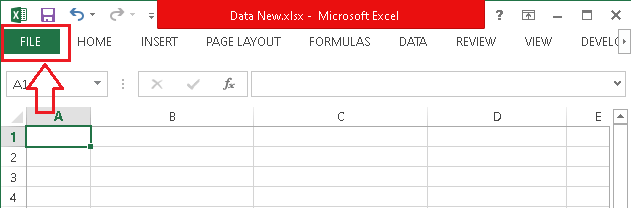
- First, we need to click on the ‘File‘ tab, as shown in the following image:
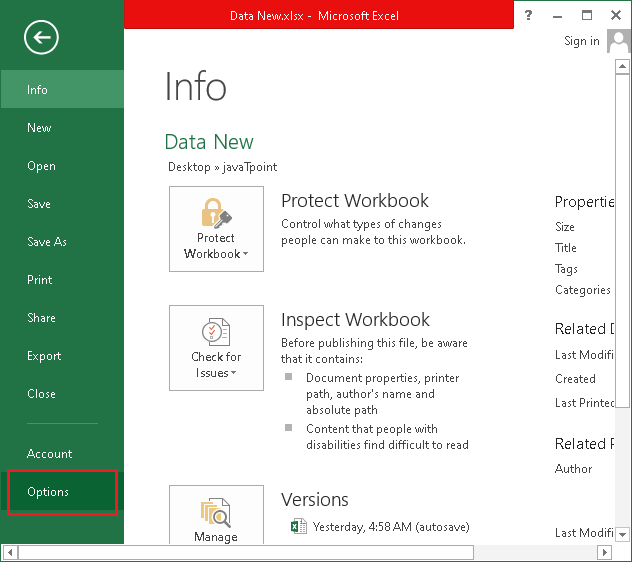
- Next, we are required to click on the ‘Options‘ from the list.
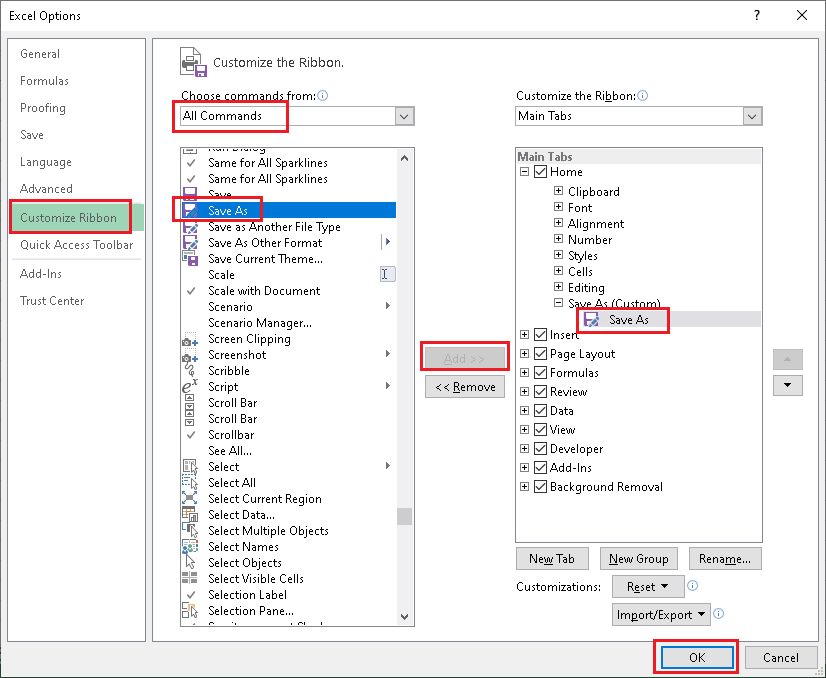
- Next, we are required to click on the ‘Customize Ribbon‘. After that, we need to select the ‘All Commands‘ from the menu and then select the ‘Save As‘ option from the list. Furthermore, we must click on the ‘Add‘ button and then the ‘OK‘ button. It is important to note that we must select the menu option from the list under which we want to add the ‘Save As’ shortcut and create a group with a custom name accordingly.
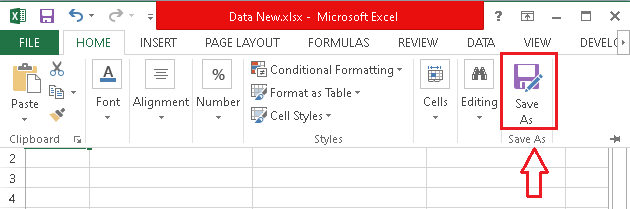
- After completing the previous step, a new shortcut will be added onto the ‘Ribbon’, which looks like this:
Whenever we want to use the ‘Save As’ command, we can use this shortcut directly from the Ribbon, and the ‘Save As’ dialog will be quickly launched.
By using the VBA
Since Excel allows us to use VBA codes, we can also use little coding as a shortcut for the ‘Save As’ command. The advantage of using this method is that we can give a file name instantly while coding. However, this method may not be friendly for beginners or people with no coding knowledge.
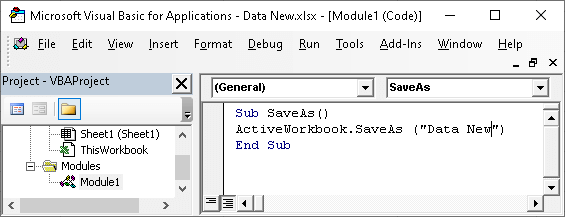
To apply this method, we can use the following syntax/ code:
Where,
‘ActiveWorkbook’ indicates the Excel file that is currently in use.
‘saveas’ indicates that the command ‘Save As’ must be executed.
‘Enter File Name Here’ means that we need to put a corresponding name by which the file has to be saved.
Once we enter the code into the VBA editor and run it, the file with an entered name will be saved into the exact location as the original one. However, it may tell us that the file will be saved in a macro-enabled format only. In our case, we use the name ‘Data New’ within the code:
Some Important Points to Remember for Using the ‘Save As’ Command/ Shortcut
The following are some crucial points to remember to avoid facing any errors when using ‘Save As’ Shortcut to save files in Excel:
- Whenever we use the ‘Save As’ command in Excel, we have to use a specific file name if the original file is in the same location. If we try to use the same name as the original file, we will get an error demonstrating that the ‘filename already exists’, and there will be an option to replace the current file with the original file. If we accidentally click on the ‘Replace’ button without reading the warning message, we will lose the original file.
- If we use the ‘Save As’ command and want to save the file name as the original file, we should choose a location with no file with that particular name.
- If we use VBA code in Excel, we must use the ‘.XLSM’ Excel extension while saving the file using the ‘Save As’ command.


