Excel VBA Range
The Excel VBA Range object represents a cell or multiple cells in the Worksheet. This object is very important object in Excel VBA.
In Excel VBA, the Range is also called the property of an individual cell or group of cells in any row or column. It is considered as a data set.
Syntax
To use range function, we need to know about three basic things in Excel VBA, such as:
- Object Qualifier: This is used to refreshing the object. The object qualifier defines the current worksheet or workbook.
Properties and Methods are used to manipulate these cell values.
- Property: This option contains information related to the object.
- Method: A method is an act of performing an action by the object. It copies, selects, sorts, and clears the data.
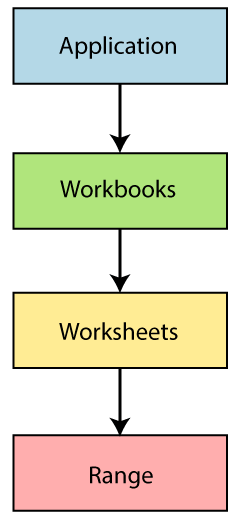
VBA follows the object hierarchy structure to define objects. We will follow the below structure:
NOTE: We connect the objects at each of the different levels by using the (.) dot.
Range Property
The Worksheet has a range of property which are used to access cells. The range property takes the same argument to perform the most excel worksheet operations, such as “A1”, “A3:C6” and more.
Refer Range Object by Range property
Range property is applied to two different types of objects, such as:
- Worksheet Objects
- Range Objects
The syntax for Range Property:
Explanation
- “Range” is a keyword.
- Within the Parentheses, we follow the keyword.
- We need to define the relevant Cell Range.
- We used Quotation (“”).
For example: MsgBox Worksheet(“sheet1”).Range(“A1”).Value
We can perform many tasks by using the Range property. And these tasks refer to:
- A single cell using the Range property.
- A single cell using the Worksheet.Range property.
- An entire row and column.
- Merged cells using Worksheet. Range property and many more.
Refer to a single cell using the Worksheet.Range property:
Step 1: First, open Excel.
Step 2: In this step
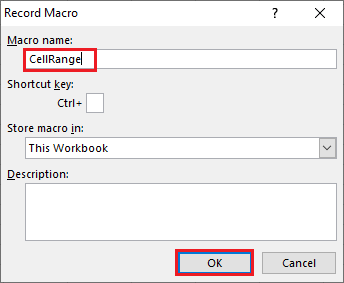
- Click on the Record Macro button.
- It will open a window, enter the program name.
- Click on the OK button.
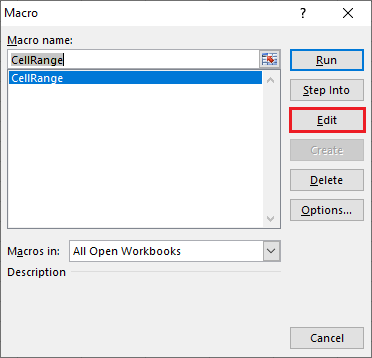
Step 3: Click on the Macro button from the menu.
- It will pop up a new window.
- Then click on the Edit button.
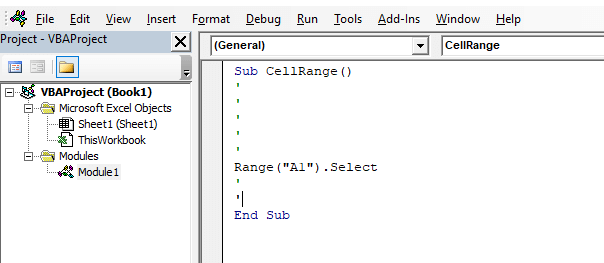
Step 4: Now, it will open the VBA code editor and write your code.
Step 5: Save the file and execute the code.
Step 6: After the execution of the code, the cell “A1” is selected automatically.
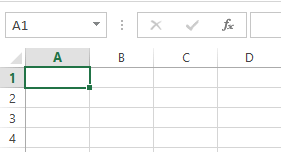
To apply another range object here is the code syntax:
| The Range for Selecting Cell | Syntax |
|---|---|
| For single row | Range(“1:1”) |
| For Single Column | Range(“A:A”) |
| For Contiguous Cells | Range(“A1:C5”) |
| For Non-contiguous Cells | Range(“A1:C5,F1:F5”) |
| For the intersection of two ranges | Range(“A1:C5 F1:F5”) NOTE: For intersection cell, there is no comma operator |
| To merge cell | Range(“A1:C5”) To merge cell use the “merge” command |
Cell Property
Cell property is similar to the Range, but the only difference is that it has an “item” property, which is used to reference the cells on the spreadsheet. Cell property is beneficial for the programming loop.
For example,
Cells.item(Row, Column)
- Cells.item(1,1) or
- Cells.item(1, “A”)
Both the lines refer to cell A1.
Range Offset Property
Range offset property selects the rows or columns and moves away from its original position. Cells are selected on the basis of Range declared.
Syntax
The offset property will move A1 cell away to one row and one column. The value of the rowoffset or columnoffset can change as per requirement. And we can also move cells backward by using a negative value (-1).


