Function Keys
F1 | F2 | F3 | F4 | F5 | F6 | F7 | F8 | F9 | F10 | F11 | F12
Function keys allow you to do things with your keyboard instead of your mouse to increase your speed.
F1
Opens Excel Help.

F2
Moves the insertion point to the end of the contents of the active cell. For example, select cell B6 below and press F2.

Note: turn off Allow editing directly in cells (File, Options, Advanced, Editing Options) and pressing F2 will move the insertion point to the formula bar.
F3
Displays the Paste Name dialog box. For example, select cell E2 below, type =SUM(, press F3 and select a name.

Note: of course, first create at least one named range.
F4
Cycles through all 4 types of cell references (absolute, mixed reference (2x) and relative). For example, select cell B5 below, click in the formula bar, move the insertion point in or to the right of G2, and press F4.

Note: if you are not editing a cell, F4 repeats the last action, if possible.
F5
Displays the Go To dialog box. For example, to select cell C15, in the Reference box, type C15, and click OK.

Note: you can also select named ranges, or click Special to quickly select all cells with formulas, comments, conditional formatting, constants, data validation, etc.
F6
Moves to the next pane in a worksheet that has been split.

F7
Displays the Spelling dialog box (the same as clicking Spelling on the Review tab).

F8
Turns on/off Extend mode. If Extend mode is turned on, select cell A1 and press → and ↓ a few times.

Note: if Extend mode is turned off, hold down SHIFT and press → and ↓ a few times.
F9
Calculates the workbook. By default, any time you change a value, Excel automatically calculates the workbook. Turn on Manual calculation (on the Formulas tab, in the Calculation group, click Calculations Options, Manual) and change the value in cell A1 from 5 to 6.

Press F9.

Note: if you are editing a cell, F9 replaces a formula with its own result.
F10
Shows the key tips (the same as pressing ALT). Key Tips allow you to quickly perform any task available on the Ribbon without using the mouse.

F11
Creates a chart sheet of a selected range.

F12
Brings up the Save As dialog box.

Note: to change the default file location, on the File tab, click Options, Save.
Next Chapter: Print
Floating Point Errors
Excel stores and calculates floating point numbers. Sometimes, the result of a formula is a very close approximation.
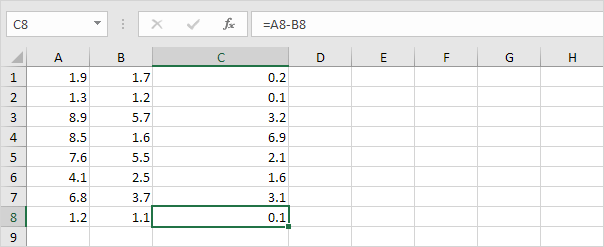
1. For example, take a look at the formulas below. At first glance, everything looks alright.

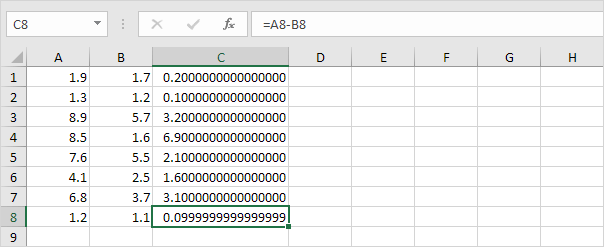
2. However, if we show 16 decimal places, we can see that one result is a very close approximation.

You don’t have to worry about floating point errors. They are rare.
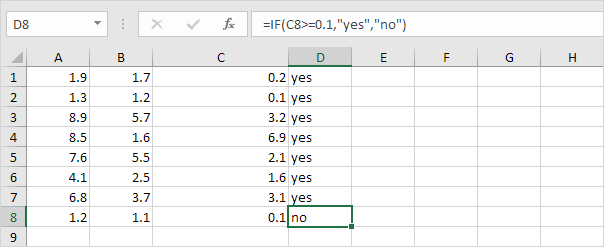
3. Even if your worksheet contains a floating point error, in most cases, this causes no problems. However, if you compare the value in cell C8 with another value, the following problem can occur.

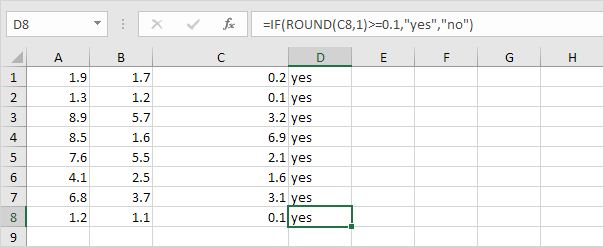
4. Use the ROUND function to fix this.

Next Chapter: Array Formulas


