How to add a text box in Excel
A Text box is also called as a text field. It is a rectangular container for the text that is used on the pages (such as web browsers, portals, word processors, log-in or registration pages, Gmail, and many more) to enter information (text).
Types of the text box
There are mainly the following two types of text boxes available with different formatting –
1. One line text box
One line text box is a simple/small box that is used to enter the single line information such as a person’s name, number, email address, or other short information.
2. Multiple line text box
Multiple line text box is used to enter the large information (multiple line information) such as education details, about yourself, working experience, and many more.
Advantages of the text box
- text box helps us to store typed text in the linked cell.
- It helps you to create a large data entry spot without changing the column widths.
Add text box in Excel
Microsoft Excel provides simple and easy ways to add text boxes in the document to increase the functionality of the worksheet. In Excel, you can create a textbox according to your needs.
There are the following easiest methods to add text box in Microsoft Excel document –
Note: The below methods are used to add text boxes in Microsoft Excel 2007, Excel 2010, Excel 2013, Excel 2016, Excel 2019, as well as Microsoft Office 365.
Method 1: Add a text box Manually using the Developers tab
The developer’s tab is one of the easiest and quickest methods to add the text box in a Microsoft Excel document.
Steps to add text box in Excel
A list of steps to add text box in Microsoft Excel document is given below –
Step 1: In the Desktop, double click on the Microsoft Excel icon to open the Excel document.
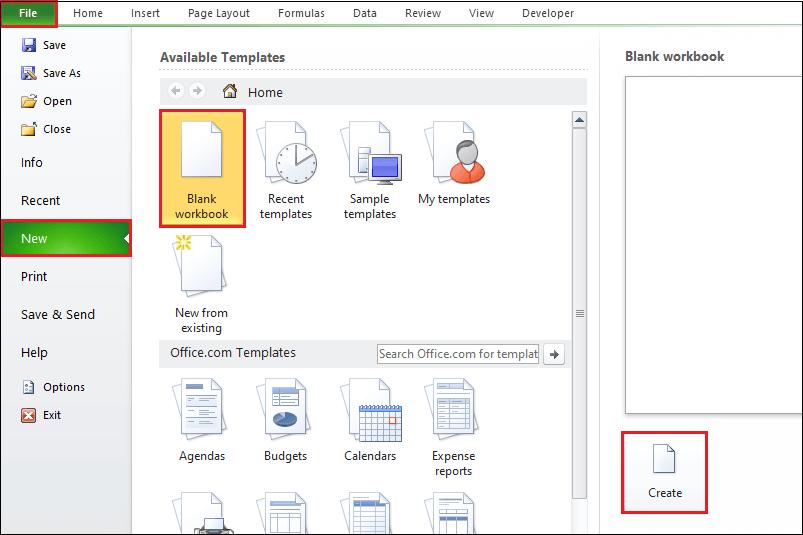
Step 2: Go to the File -> New -> Blank document -> Create to open a new Microsoft Excel document. Click on the File -> Open -> Browse your file location -> Open button to open an existing Microsoft Excel document. (We are going to open a new Microsoft Excel document.)
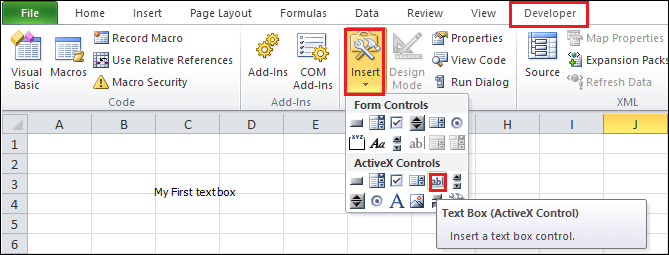
Step 3: Click the Developer tab on the ribbon. If the Developer tab does not appear on the ribbon, then first enable the developer tab to the ribbon.
Note: To enable Developer tab go to the File -> Options -> Customize Ribbon -> Main tabs -> Tick Developer tab checkbox -> OK.
Step 4: Click on the Insert drop-down icon under the Controls section. A list of options will appear. Under the ActiveX Controls, click on the TextBox tool (ActiveX Control), as shown in the screenshot given below.
Step 5: Place the cursor on the document location where you want to add the text box. Drag the text box in your spreadsheet/ worksheet based on your need.
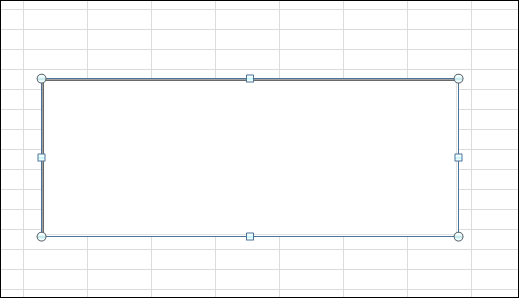
Now, the below-given screenshot shows that a text box is added to the Microsoft Excel document.
Note: Right-click on the text box and then click the Format Control tab to specify the control properties.
Method 2: Add a text box using the Insert tab
Microsoft Excel also allows you to add your desired text inside a text box using the text box option under the Insert tab on the ribbon.
Steps to insert a text box
A list of steps to insert a text box in Microsoft Excel document is discussed below –
Step 1: Go to the Search box at the bottom of the desktop. Type Microsoft Excel and press the Enter key to open a Microsoft Excel spreadsheet.
Step 2: Click on the File -> New -> Blank document -> Create to open a New Microsoft Excel document. Click on the File -> Open -> Browse document location -> Open button to open an Esxisting Microsoft Excel document.
Note: In our case, we are going to open an Existing Microsoft Excel document.
Step 3: On the Ribbon, click the Insert tab and then click the Text Box option under the Text section.

Note: In Microsoft Excel 2013 and above versions, go to the Format tab and click on the Text Box icon in the Insert Shapes section.
Step 4: Using the mouse pointer, drag the text box on your worksheet. Adjust the height and width of the text box according to your requirement.
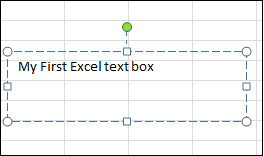
Step 5: Place the cursor inside the text box and start writing the text that you want to add to the textbox. See the screenshot given below.
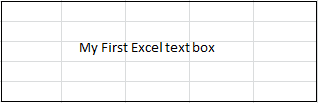
Step 6: After completing the text inside the text box, press Esc to cancel editing mode or click anywhere outside the text box. Now, the below screenshot shows that text is added to the Microsoft Excel spreadsheet.
Method 3: Add a text box with VBA
In the Microsoft Excel document, you can also use the programming concept to add a text box. In this method, you can use the UserForm option inside the Insert tab to add the text box. UserForm is the most commonly used tool that contains various different control options such as Text Box, Msg Box, Input Box, and more.
Steps to add a text box
Follow the below given easiest steps to add a text box with VBA –
Step 1: Open a New or an Existing Microsoft Excel document to add a text box.
Step 2: Press or strike the Alt + F11 keys together from the keyboard to open/navigate to the VBA pane.
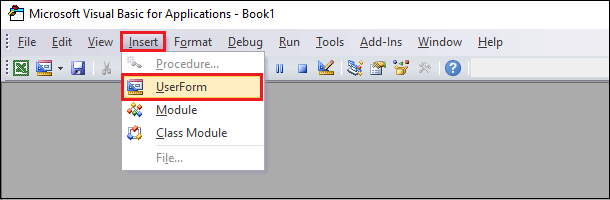
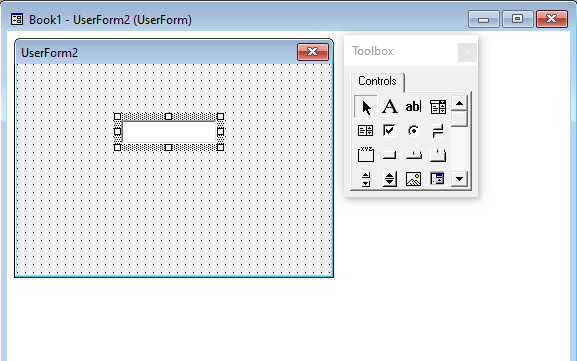
Step 3: Go to the Insert tab, a list of options will appear on the screen. Click on the UserForm option to insert UserForm in VBA.
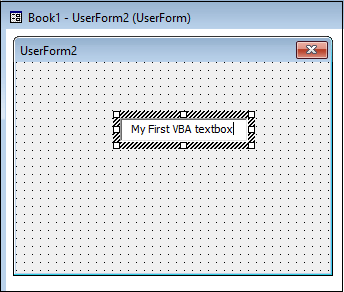
Step 4: A small Toolbox dialog box will appear with the UserForm window. Select TextBox form the Toolbox dialog box, as shown in the below screenshot.
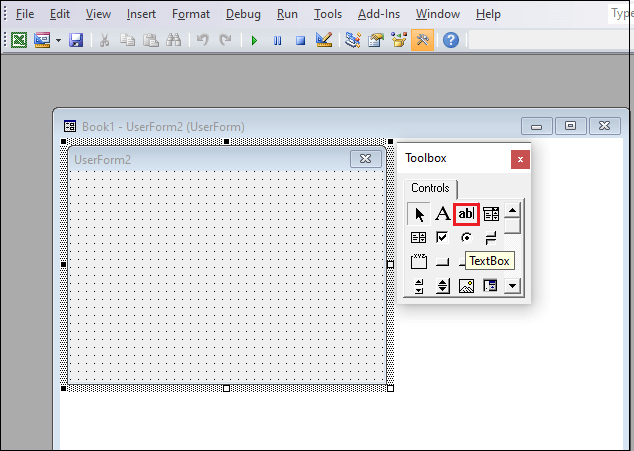
Step 5: Drag the Text box to the UserForm window.
Note: Press the F4 key form the keyboard to view all properties of UserForm. Using these properties, you can easily make necessary changes like changing the name of UserForm, Font, Caption, Height, and many more.
Step 6: Type your desired text (My First VBA textbox) in the TextBox.