How to attach file in excel
The Excel user may require to insert a file as an attachment to their Excel sheet. They can share more information with the help of file attachments. An excel user can insert any type of file in an Excel sheet. The users have to follow a few simple steps to do this.
When a file is attached, it floats over the spreadsheet instead of single cell you selected. There are several ways to insert any type of file into an Excel sheet as an attachment. The attachment file can be an image file, pdf, word, text, or any type of file.
This chapter of Excel file attachment will help you to learn to attach a file in MS Excel sheet.
Insert files into Excel sheet as an icon
There are several ways in Excel to insert a file into an Excel sheet. We will insert a file in the B2 cell of an Excel sheet.
Follow the steps to insert an existing file as an attachment into an Excel sheet:
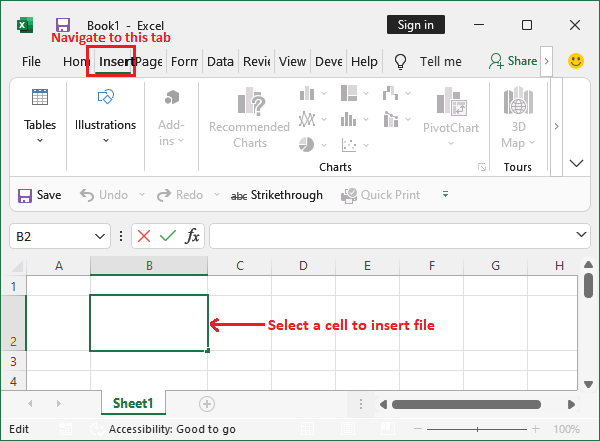
Step 1: Select a cell where you need to insert an attachment file or image (anything you want). Then navigate to the Insert tab.
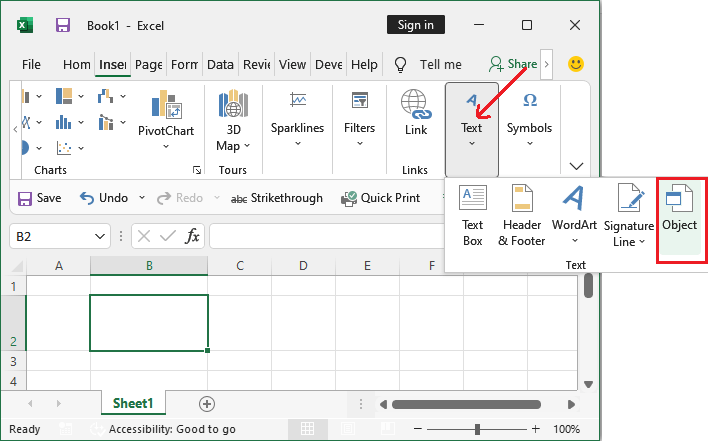
Step 2: Click the Object residing inside the Text group dropdown list at the end of the ribbon.
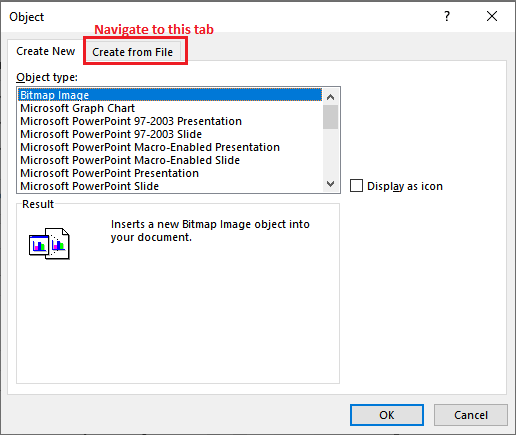
Step 3: A Object window panel will open where navigate to the Create from file tab.
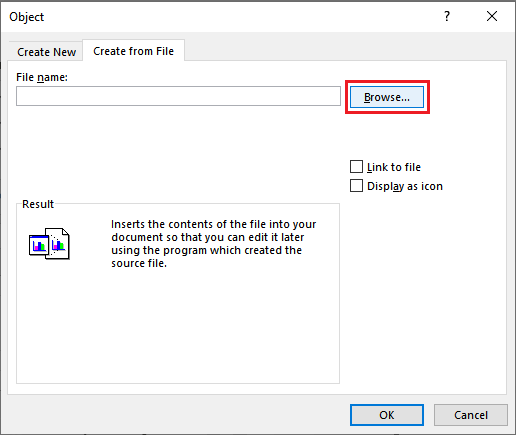
Step 4: Here, click the Browse button to search the file in your local storage on your system for file attachment.
Step 5: Now, browse an existing file you want to insert and click Open button. We have selected a pdf file to insert.
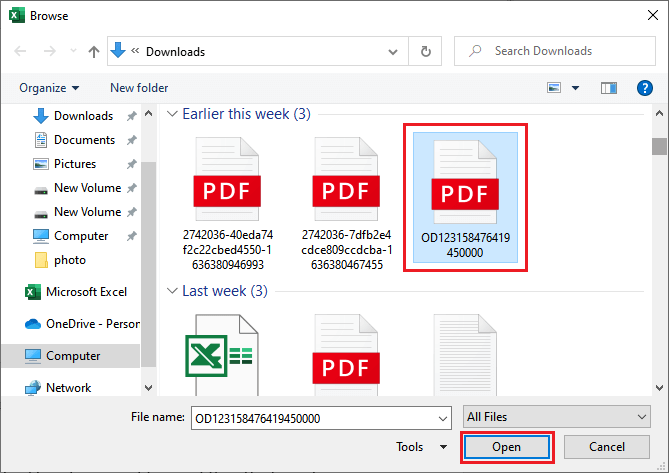
Step 6: Mark the Display as icon checkbox if you want to insert the attachment as an icon that has link to this attachment file.
Click OK to make the process complete to insert an attachment as an icon.
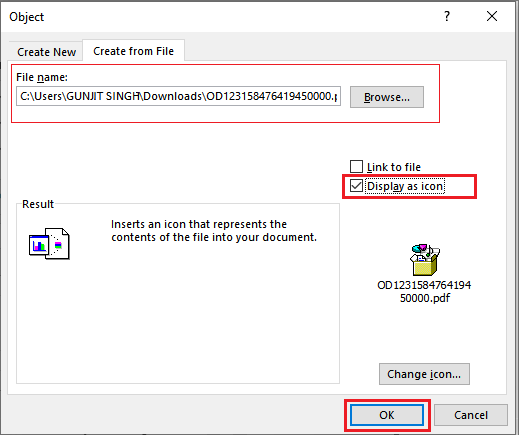
You can also change the icon to be shown after attachment file into Excel sheet.
Step 7: You can see that a file has been inserted to Excel sheet as an icon.
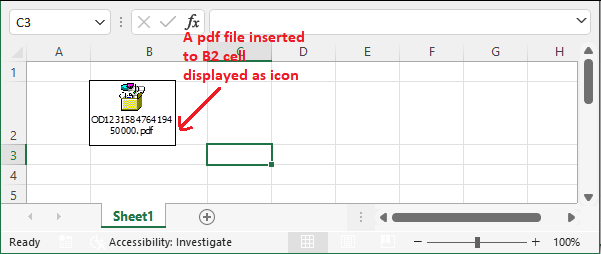
Tip: You can resize the icon size.
Step 8: When you double-tap on this icon, a popup will open like this. Click Open on this popup window.
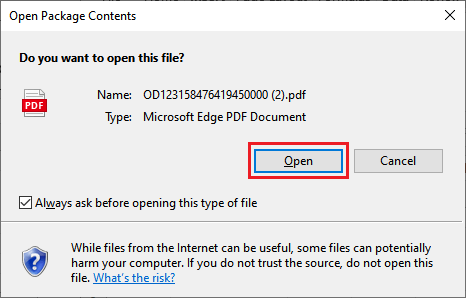
Step 9: The inserted file will be opened in the software which type of file is this. Our attachment file will open in a browser.
Insert files into Excel sheet as link
As you have learned in previous steps to insert a file as an icon into an Excel sheet. Now, we will show you the steps to insert a file attachment into the Excel file as a link. Follow the steps to insert an existing file as a link attachment into an Excel sheet:
Step 1: Select a cell where you need to insert an attachment file or image (anything you want). Then navigate to the Insert tab.
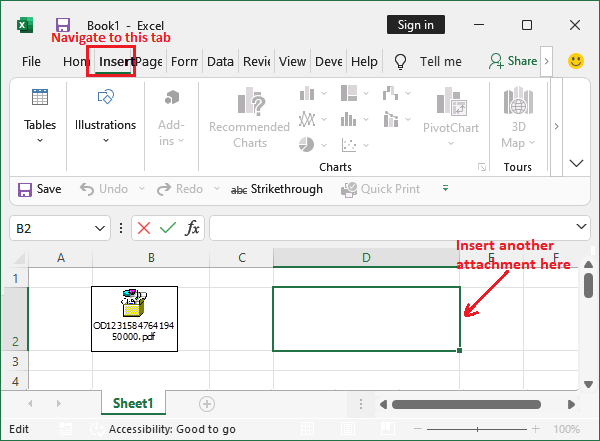
Step 2: Click the Object residing inside the Text group section at the end of the ribbon.
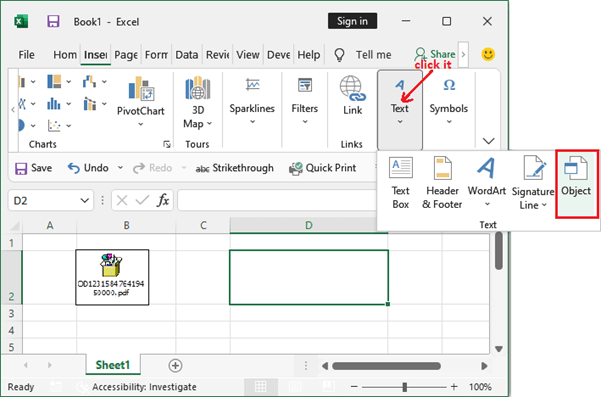
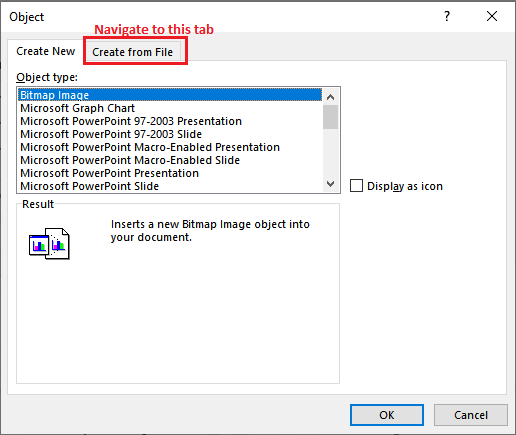
Step 3: A window panel will open where navigate to the Create from file tab.
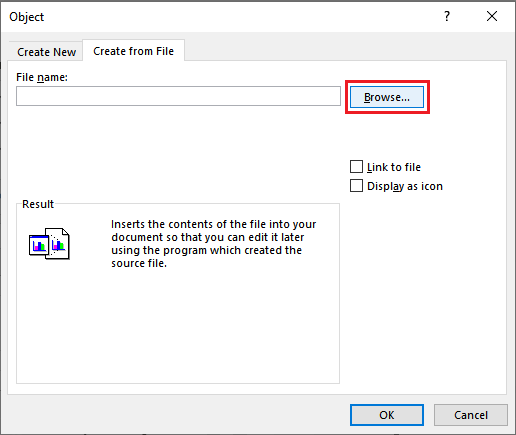
Step 4: Here, click the Browse button to search the file in your local storage on your system for file attachment.
Step 5: Now, browse your existing file in your system and click the Insert button. We are inserting a video file as an attachment.
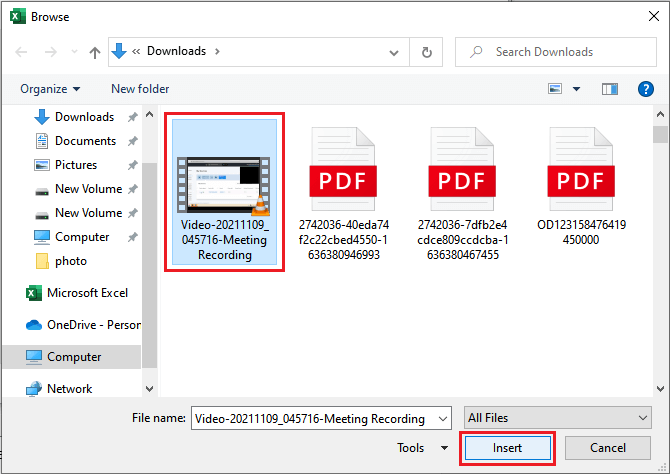
Step 6: This time, mark the Link to file checkbox to insert the attachment as a link instead of an icon or complete file view.
Click OK to make the process complete to insert an attachment as an icon.
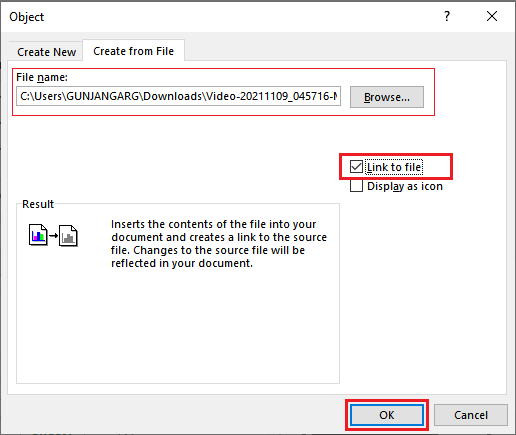
Step 7: You can see that a video file has been inserted into the Excel sheet as a link to this file.
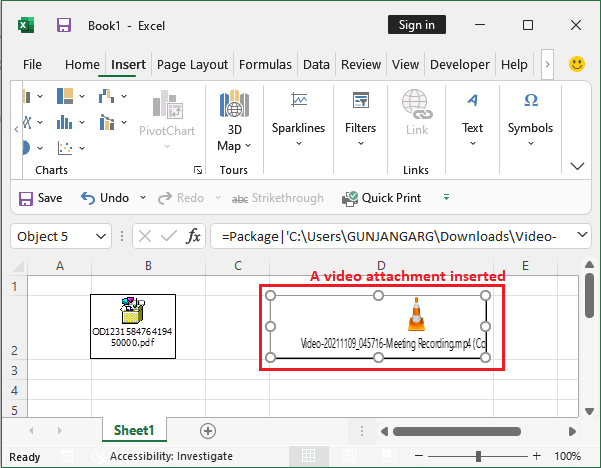
Tip: You can resize the link size. You can also see the file link along with the file type icon.
Step 8: When you click on this link of the file/image you attached, a popup will open like this. Click Open on this popup window.
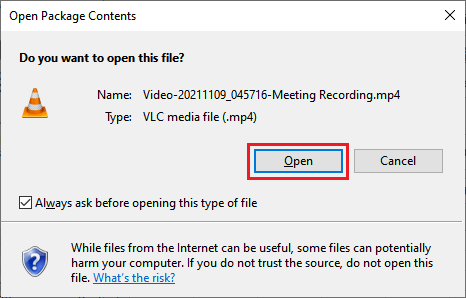
The inserted video attachment file will open and play in the software which type of file is this. Our attachment file will open in a browser.
Attachment should be on same computer
You can attach different types of files in Excel whichever you need. You can insert a file with other graphics as well. The user must know that the file either should be available on the same computer or on a server that must be available while using file or during presentation.
In MS Excel, you can use object linking or embedding to attach the other format file into an Excel sheet. The file can be a word file, image file, or Excel file as well.
Insert files into Excel sheet
Instead of inserting a file that displays as link or as an icon, you can directly insert it into an Excel cell. This will completely visible in the file.
We have already explained the steps to insert a file that displays either as an icon or link into an Excel sheet. Now, we will show you the steps to insert a file attachment that will be directly visible in Excel sheet without clicking on any link or icon. Follow the steps to insert an existing file as a link attachment into an Excel sheet:
Step 1: Select a cell where you need to insert an attachment file or image (anything you want). Then navigate to the Insert tab.
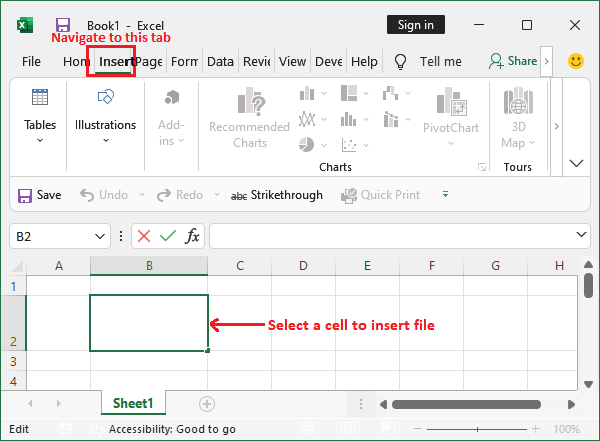
Step 2: Click the Object residing inside the Text group section in the end of the ribbon.
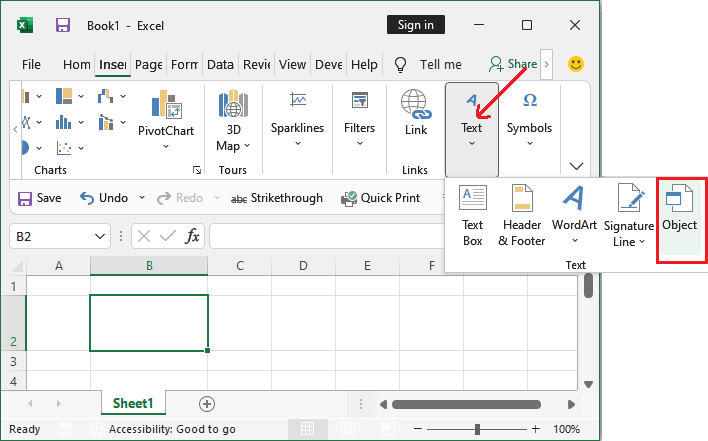
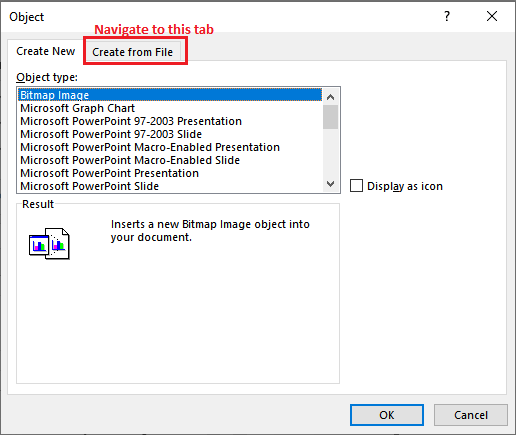
Step 3: On the Create from file tab, select an object type you want to insert.
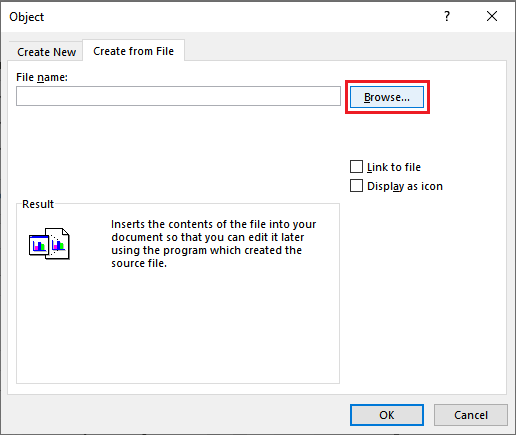
Step 4: Click the Browse button to look for the file in your local storage.
Step 5: Select a file from your system and click the Open button here. For this example, we have selected a word file.
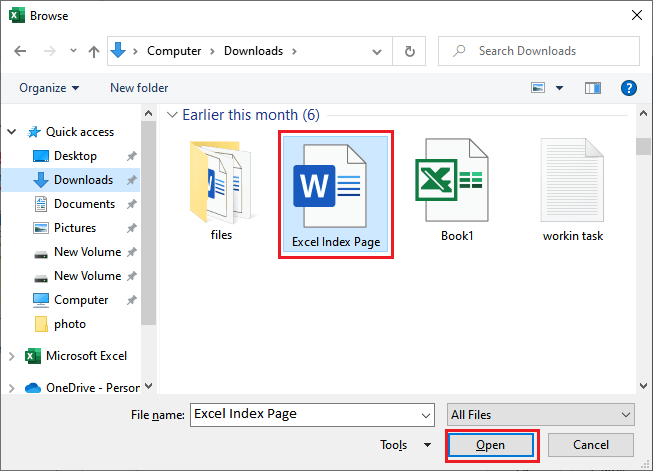
Step 6: Without doing anything here, click OK to complete the process and insert an attachment as an icon.
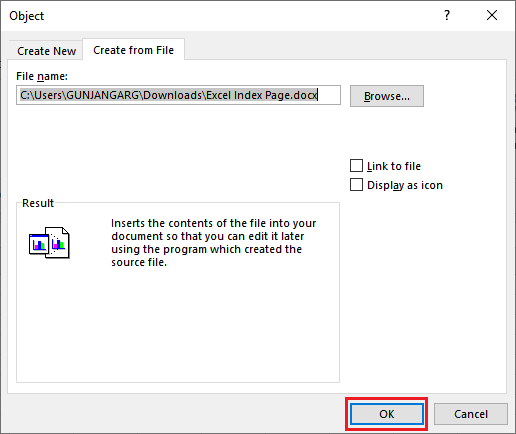
Step 7: You can see that a file has been inserted into an Excel sheet that is completely visual in Excel without clicking any icon or link.
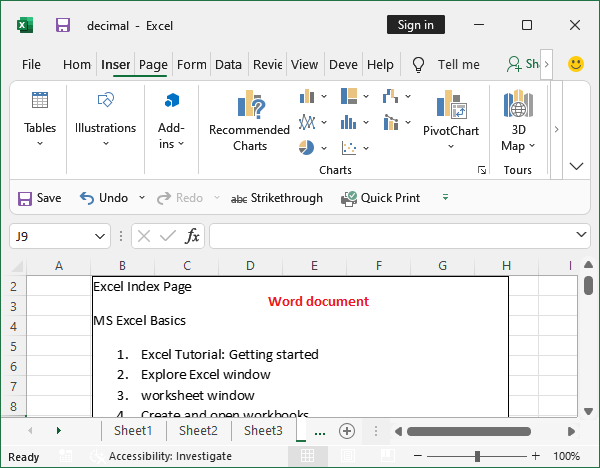
A word document has been inserted into an Excel sheet, which is currently uneditable.
Step 8: To make this inserted document editable inside Excel, double-tap on it. It will open in its supported format inside Excel, like below –
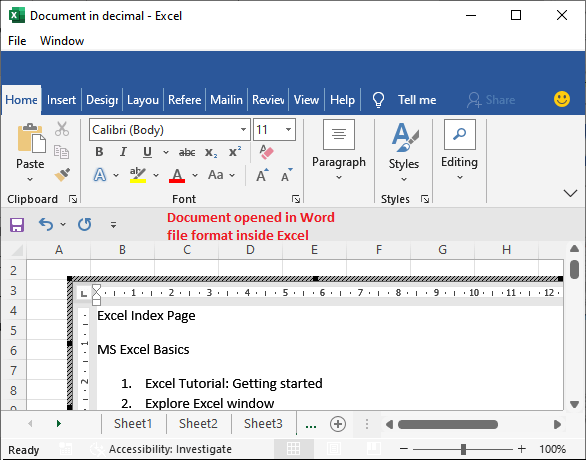
Now, you can edit anything inside the inserted document from here.
Create a new object from inside Excel
You can create an entirely new object based on another program without leaving your workbook. For example, if you want to add a more detailed explanation to your chart or table, you can create an embedded document in Excel, such as a Word or PowerPoint file or image file as well.
In MS Excel file, the user can either set your object to be displayed directly in a worksheet or also can add an icon that opens the file.
It allows the users to create an object type directly from Excel without leaving the Microsoft Excel screen. After that, created object will automatically insert into the file.
Step 1: Select a cell where you need to insert an attachment file or image (anything you want). Then navigate to the Insert tab.
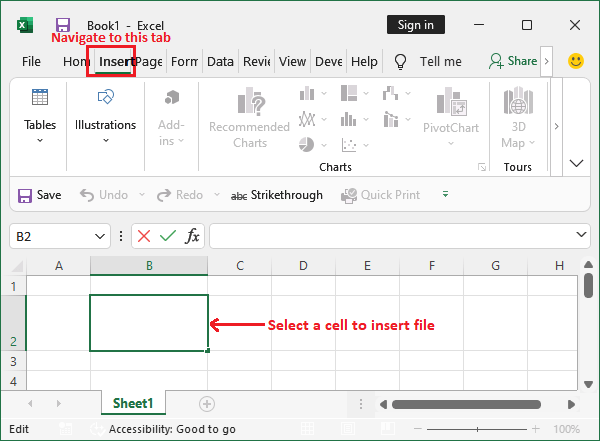
Step 2: Click the Object residing inside the Text group section at the end of the ribbon.
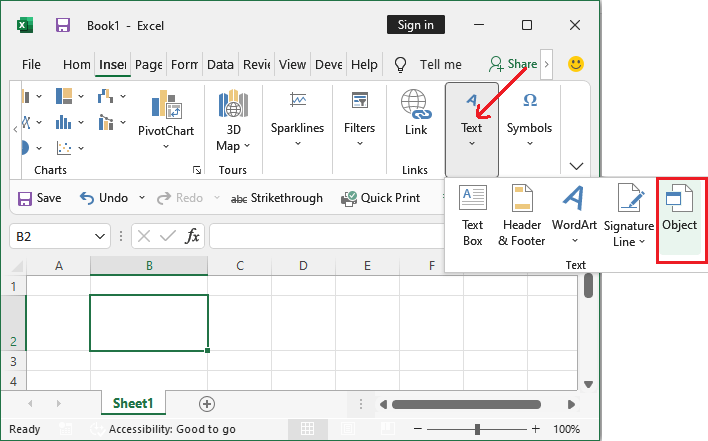
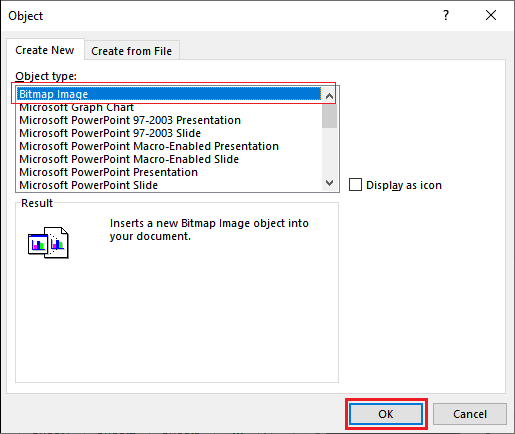
Step 3: On the Create New tab, select an object type you want to insert. For example, we select
Step 4: A paint window will open inside the MS Excel where you can draw and edit any image.
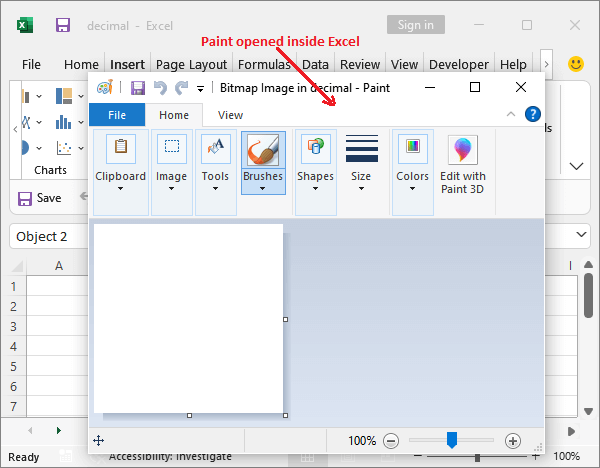
Step 5: You can draw anything you need like we have designed the following image.
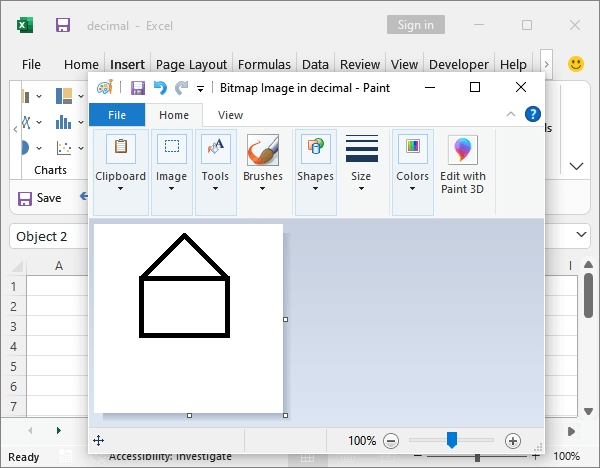
Step 6: The image is automatically inserted into this Excel file as an object.
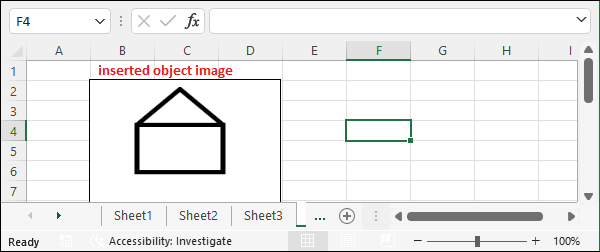
You have now not to do anything. Just save your Excel file. If you want to edit the inserted object image, double-tap on the image to open up in paint directly from here.
Tip: Any image or file created through Excel object does not externally save on your system. It only keeps inside the MS Excel file in which you create it.
In this way, you can create word documents, graph charts, PowerPoint documents, and other docs you need.


