

How to Insert Checkbox in MS Excel?
MS Excel, short for Microsoft Excel, is one world’s most well-known powerful spreadsheet software to record vast data sets and perform calculations. It also enables users to adjust or manage the appearance of our sheet or data using various built-in formatting and interactive options. The checkbox is one such existing Excel feature.
The checkbox is mainly defined as an interactive Excel tool that allows users to select or deselect an option within the cells across worksheets. It is very common and usually seen in various web forms present online. In Excel, we can use checkboxes to create interactive checklists, dynamic charts, dashboards, and more.
In this tutorial, we discuss the method or solution on how to insert a checkbox in Excel. We also include a relevant example showing how Excel checkboxes can be useful.
Note: We must not get confused between the checkbox and checkmark. Both are different objects in Excel. The checkbox has the shape of a rectangular box with or without a checkmark. However, the terms ‘Check Box’ and ‘Checkbox’ are used interchangeably.
Inserting a Checkbox in Excel
Inserting a checkbox in an Excel sheet is one of the easiest tasks. However, it may not seem easy if we don’t know the exact insertion process. If we go through each of the default tabs on the Ribbon and try to find the tool to insert a checkbox, we usually don’t see an option which makes the process a trivial thing.
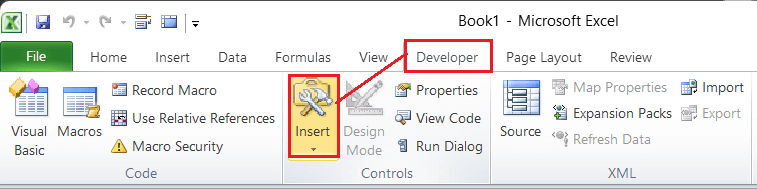
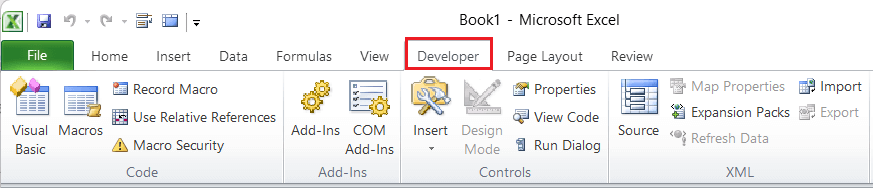
Like other Form Controls of Excel, the checkbox tool is also placed under the Developer tab. If we have the Developer tab on our Ribbon, we can easily insert one or more desired checkboxes. The following steps must be executed to insert a checkbox in an Excel cell:
- First, we need to go to the Developer tab on Ribbon. We must click on the Insert button under the section Controls, which will display additional Form and ActiveX Controls.

- Under Form Controls, we see a checkbox icon. We must click on this icon. It is nothing but a square that contains a single tick or checkmark, as shown below:
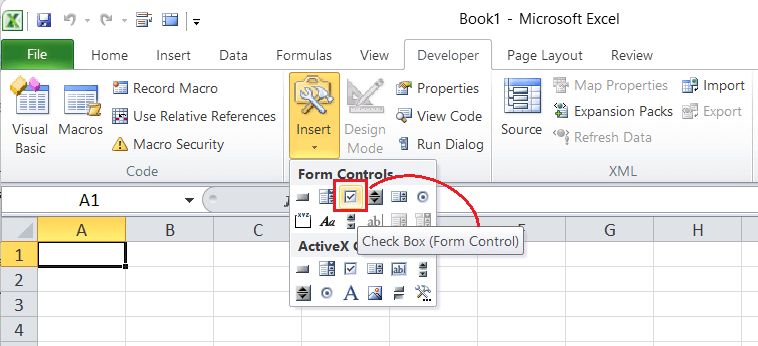
- After clicking on the checkbox icon, we need to click anywhere on the worksheet to insert a checkmark. The checkbox will appear on our worksheet that we can also drag to change the location accordingly.
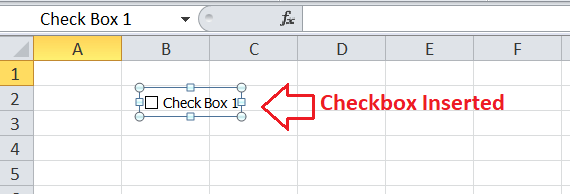
In the above image, we can see that Excel automatically inserts the default Caption Name ‘Check Box 1’ for the first inserted checkbox. If we insert more checkboxes using the above steps, the names or captions will be assigned further in a sequence. However, we can edit or remove these captions accordingly.
Note: By default, Excel does not display a Developer tab on the Ribbon. However, we can enable or activate the tab from Excel settings accordingly.
Enabling or Activating the Developer tab on the Ribbon
If there is no Developer tab on Excel’s Ribbon, we can perform the following steps to add it immediately:
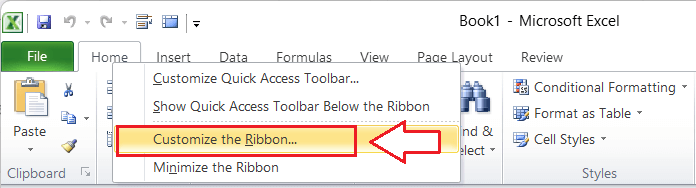
- First, we must press a right-click button via the mouse on any existing Excel tabs on the Ribbon. Afterwards, we must click on the ‘Customize the Ribbon‘ option. This will open the Excel Options window.
Alternatively, we can access the ‘Excel Options’ window by navigating to the File tab > Options.
- In the Excel Options window, we must ensure to select the ‘Customize Ribbon‘ option from the left-side section. We must locate the ‘Developer‘ tab on the right side list under the Main tabs.
Once the Developer tab is located, we must select the checkbox to activate this tab on the Ribbon. By default, the Developer tab is added next to the View tab. However, we can arrange the position using up/down arrows.
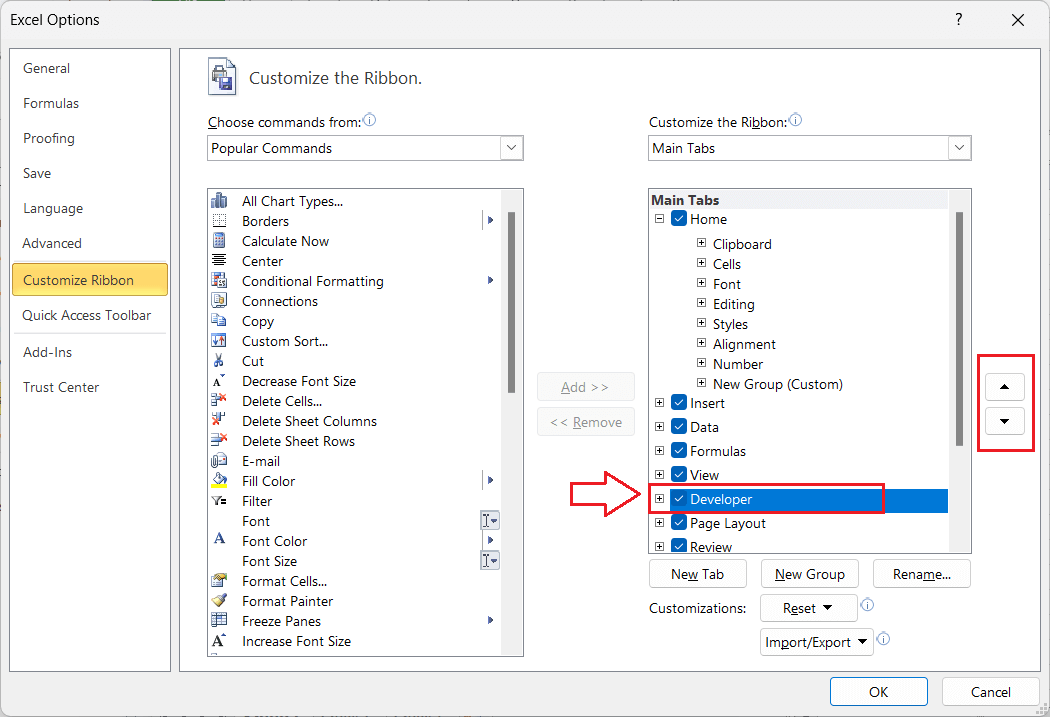
- Lastly, we must click the OK button to apply the changes accordingly. The Developer tab will now appear on the Ribbon.
Once the Developer tab is activated in Excel, it will remain visible for future use. It means we see this tab every time we open an Excel window, whether a new or existing worksheet. If we don’t need the Developer tab anymore on our Ribbon, we can follow the same steps and untick or uncheck the Developer tab option.
Editing a Default Caption/ Text in the Checkbox
We can edit and enter our desired text next to the inserted checkbox. Also, we can completely delete the text and use the checkbox alone. It completely depends on our choice and requirements.
We can execute the following steps to manage the default caption or text next to the checkbox:
- We must press the right-click button on the inserted checkbox and select the ‘Edit Text‘ option in the list.
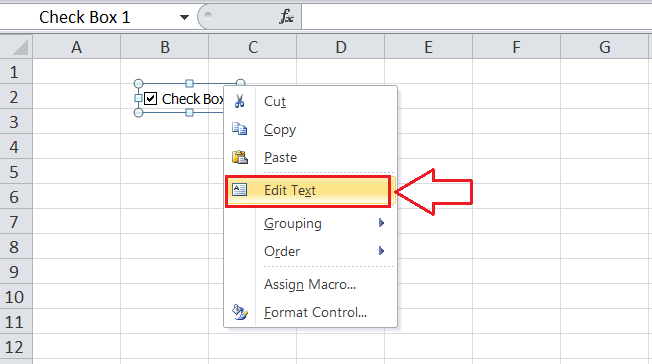
- After that, we can click on the text area and modify it accordingly. To delete the text, we can highlight the entire text and press the ‘Backspace’ or ‘Delete’ key. So, our checkbox appears without a caption.
Controlling Checkbox Size and Position
Unfortunately, we cannot change the checkbox size within the worksheet. In other words, the size of the checkboxes in Excel is pretty much fixed. However, we see a rectangular resize box around the checkbox. But, this does not help in resizing the checkbox. If we try to change the size using the checkbox object handlebars, we only adjust the object frame. It is suggested to keep the size of the object handlebars within an Excel cell where the corresponding checkbox is inserted.
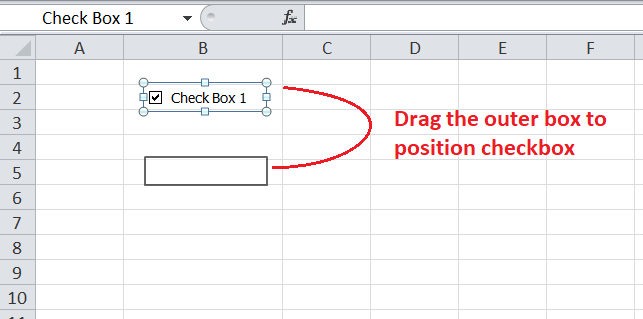
Apart from the size, the position of the checkbox can be managed as per requirements. It is easy to adjust the position of the checkbox within an Excel sheet. We only need to drag the rectangular frame or object handlebar to the desired area we want to move the checkbox. We must move our cursor on different areas of the outer frame around the checkbox until our pointer (cursor) changes to a cross-style icon. Then only we can hold and drag the checkbox to the desired location within the worksheet.
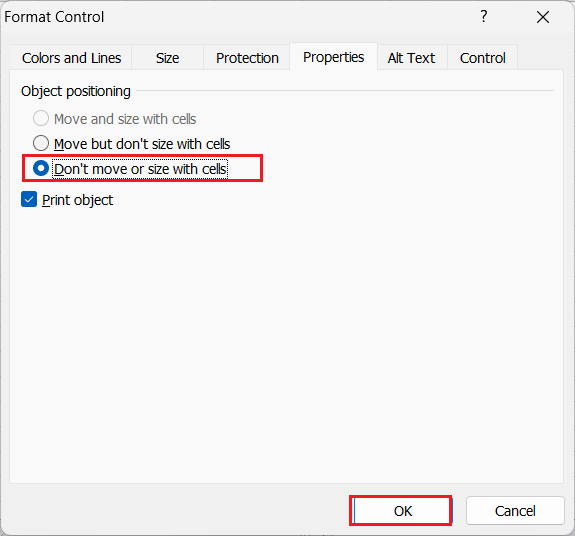
Additionally, we can also fix the position of the checkbox in the worksheet. For this, we must press right-click on the checkbox, select the ‘Format Control‘ option and choose the ‘Don’t move or size with cells‘ option under the ‘Properties‘ tab.
Copying a Checkbox/ Inserting Multiple Checkboxes
Although we can use the above-discussed steps to insert many checkboxes in Excel, it will be a lengthy process. We have to repeat the steps again and again for each checkbox. Instead, we can use the typical copy-paste feature of Excel and insert as many checkboxes as desired.
We have first to insert a single checkbox in our Excel sheet. After that, we can select this checkbox and press the keyboard shortcut ‘Ctrl + C‘ to copy it. After copying the checkbox, we must go through each cell or area where we want to insert checkboxes and press the keyboard shortcut ‘Ctrl + V‘ on each corresponding cell/area. This will paste the checkboxes accordingly.
Instead of using the typical copy-paste approach, we can select a checkbox and press the keyboard shortcut ‘Ctrl + D‘ to duplicate and paste the selected checkbox instantly. This automatically inserts a checkbox each time we press the shortcut buttons. The new checkbox is inserted at a location nearest to the previously inserted checkbox.
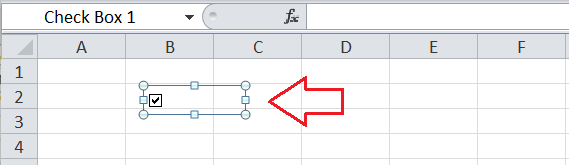
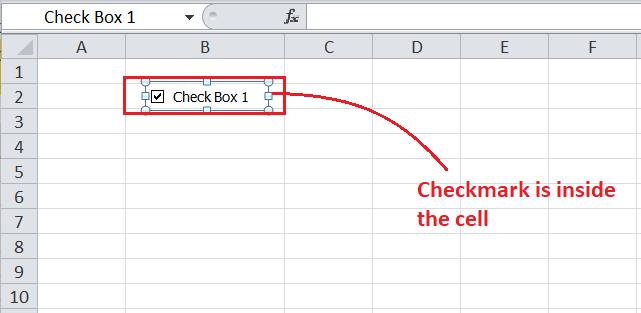
Apart from the above two approaches, Excel also offers another efficient method. However, it is usually helpful when inserting multiple checkboxes into adjacent cells (contiguous cells). Before using this method, we must ensure that the checkbox’s size and position are adjusted to reside completely within an Excel cell. It must look like this (with or without text):
Once the size and position of the checkbox are completely adjusted within the cell, we need to click on the corresponding cell to select or highlight it. Alternatively, we can use the keyboard arrow keys to move to that cell.
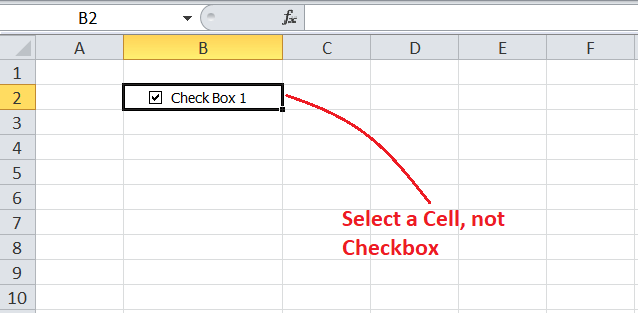
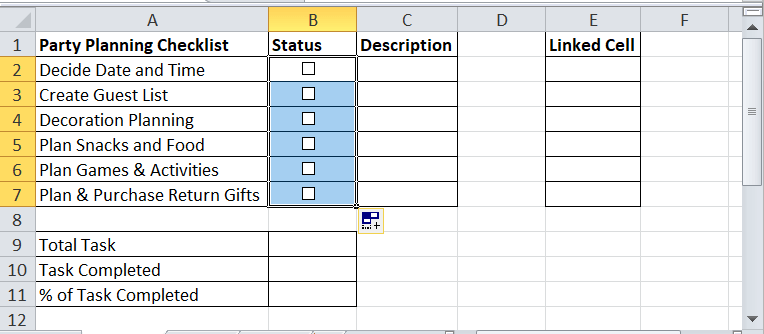
After the corresponding cell is selected, we must click, hold and drag the Fill Handle from the lower-right side corner of the cell in the direction (top to bottom or left to right) we want to insert new checkboxes.
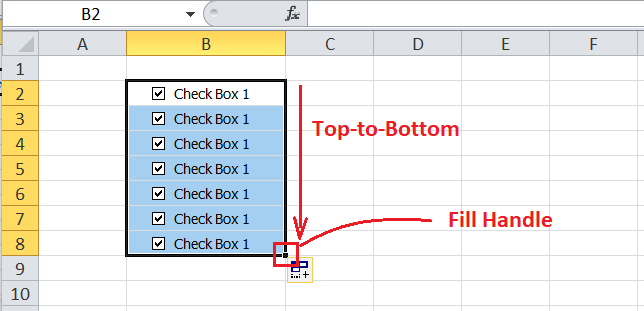
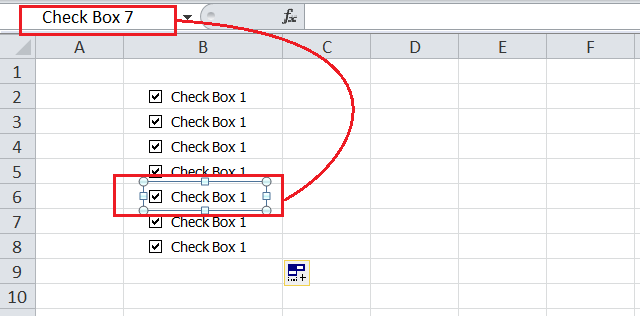
In the above image, we inserted the checkboxes from top to bottom. However, we see that each checkbox contains the same caption. The caption for each checkbox can be edited accordingly. It is essential to note that Excel creates a unique name for each corresponding checkbox behind the scenes (or in the backend).
Linking a Checkbox to an Excel Cell
When a checkbox is inserted in an Excel sheet, we can select or deselect (check/ uncheck) by clicking on it via the mouse. However, there will be no additional response or change in the sheet. Instead, we can link the inserted checkbox to an Excel cell in an interactive way that Excel will respond to any change (check/uncheck) made on that particular checkbox.
Linking a checkbox to an Excel cell helps us represent the status of the checkbox in a more meaningful way and apply other formulas accordingly. To link to checkbox to a cell, we must execute the steps below:
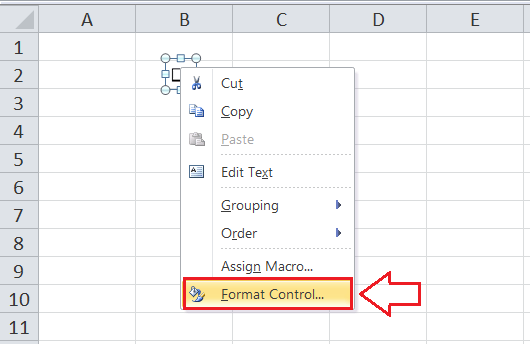
- First, we must press the right-click on the inserted checkbox and choose the ‘Format Control‘ option.
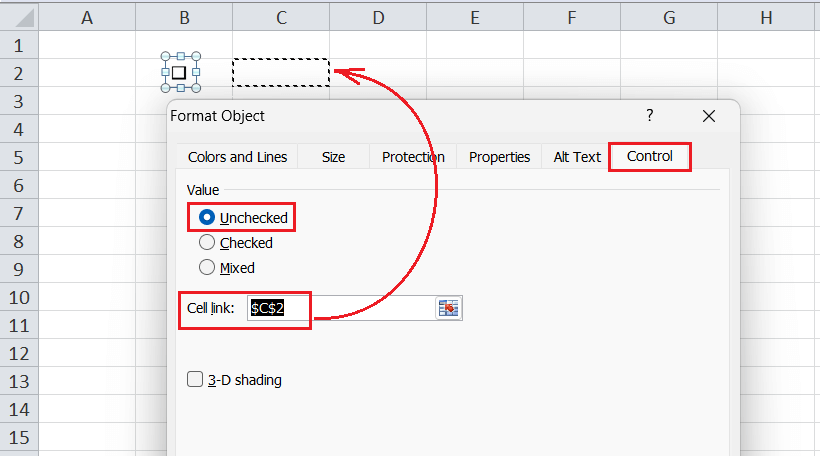
- Next, we must navigate the ‘Control‘ tab in the Format Object window. We see three sections here: Value, Cell link, and 3-D Shading. Under the Value section, we get the following three options:
- Unchecked: This option is used to display a checkbox without a tick sign or a checkmark in it. It returns a ‘FALSE’ Boolean value or statement.
- Checked: This option displays a checkbox with a tick sign or a checkmark inside it. It returns a ‘TRUE’ Boolean value or statement.
- Mixed: This option keeps the checkbox empty (neither TRUE nor FALSE) until further action is performed. It is mainly useful for the VBA where the status of the checkbox is neither checked (TRUE) nor unchecked (FALSE) until an action is performed.
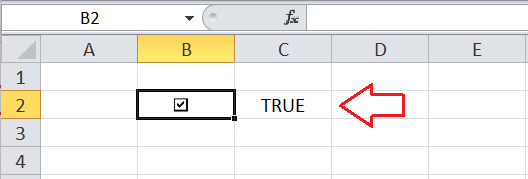
We select the ‘Unchecked’ option to keep the checkbox empty by default. The ‘Cell link‘ box is the area where we need to enter or select the empty cell reference to link to the selected checkbox. We select the cell next to the right side of the checkbox, as shown below:
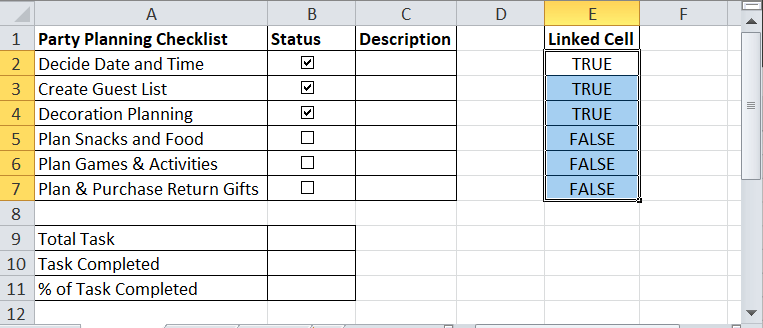
- Lastly, we must click the OK button to apply the changes. Similarly, we can repeat the above steps if there are more checkboxes to link with the other cells. If we now select (or tick) the checkbox, Excel displays a TRUE statement while FALSE for cleared or unchecked checkbox.
Linking Multiple Checkboxes to Cells
If there are many checkboxes that we want to link to other cells, there is a quick but error-prone method. This includes the following steps:
- Select the checkbox by clicking on it while holding down the Ctrl key.
- Click the Formula bar, enter the equal sign and click on the cell to link.
- Press the Enter key.
- Repeat the steps for each checkbox.

At this point, checkboxes and linked cells probably don’t make sense. Let us explore the opportunities of checkboxes and linked cells and how they help make our sheets look attractive with the help of an example.
Example: Creating a To-Do List inserting the Checkboxes
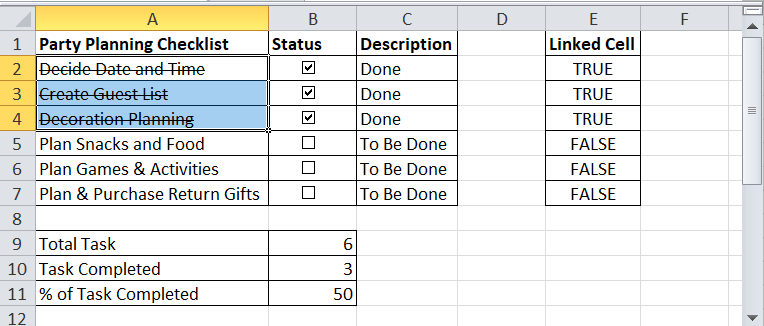
This example discusses the steps to create an interactive To-Do List based on the checkboxes. We create a list where the following things will happen:
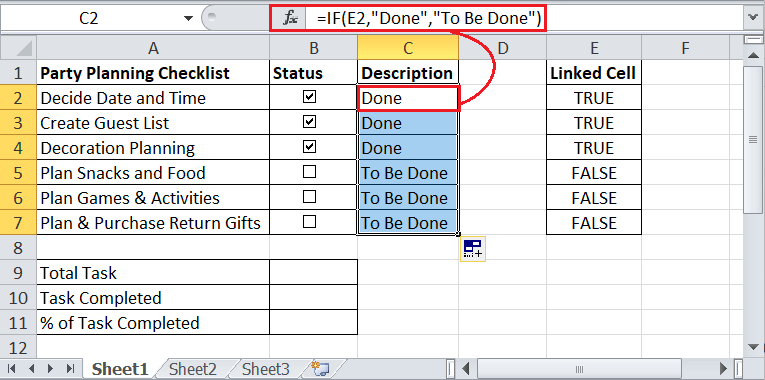
- Once we check the inserted checkbox, the description changes from ‘To be done’ to ‘Done’.
- Once the task is marked as completed, the value of the linked cell changes from ‘FALSE’ to ‘TRUE’.
- Once the task is completed, the cell containing that task gets a strikethrough format for the text.
- The total number of tasks, number of completed tasks, and percentage of the completed tasks are displayed and updated in a real-time.
Let us now create our interactive To-Do-List by following the below steps:
- First, we arrange our data and enter a list of all the tasks or activities in cells from A2 to A7.
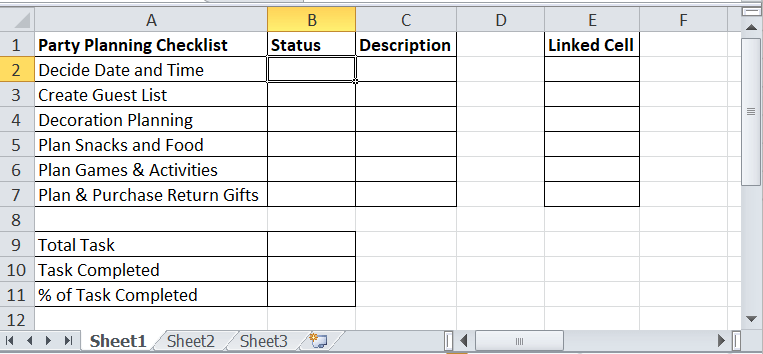
- Next, we insert the checkboxes in the following cells from B2 to B7.
- After that, we link the checkboxes of column B to the respective cells in column E. We must manually link each cell separately. We must tick/untick the checkboxes to see results (TRUE or FALSE) in linked cells accordingly.
- In cell C2, we must enter the formula: =IF(E2,”Done”,”To Be Done”) or =IF(E2=TRUE,”Done”,”To Be Done”) and copy or drag it to the other cells in column C. This will display a description like this:
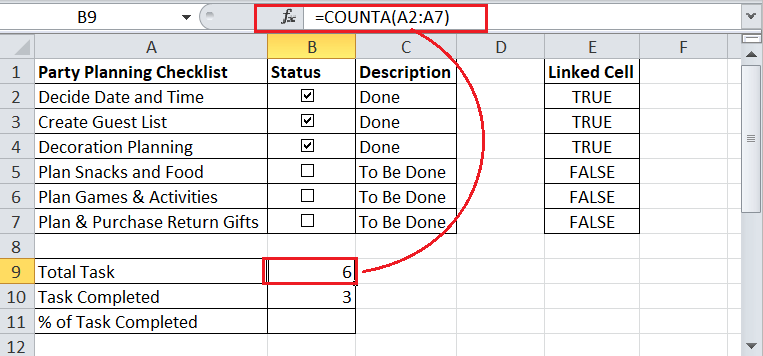
- In cell B9, we must type the formula: =COUNTA(A2:A7) to calculate the total number of tasks.
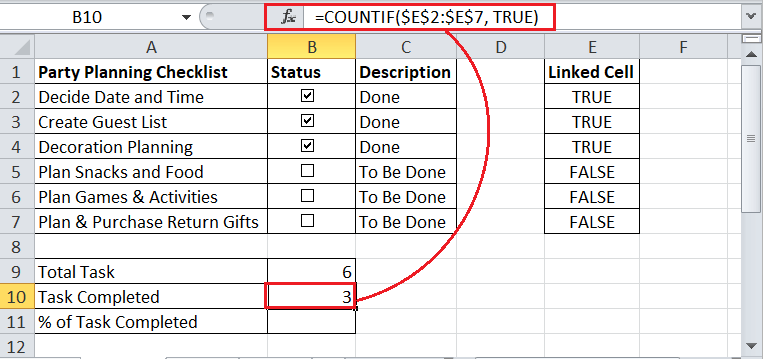
- In cell B10, we must type the formula: =COUNTIF($E$2:$E$7,TRUE) to calculate the total number of completed tasks.
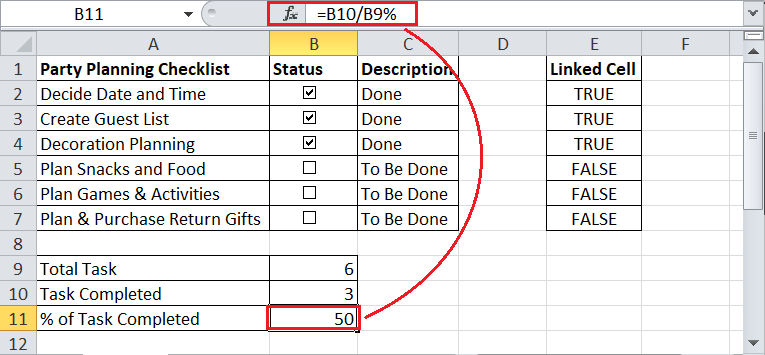
- In cell B11, we must type the formula: =B10/B9% to calculate the total percentage (%) of the number of completed tasks.
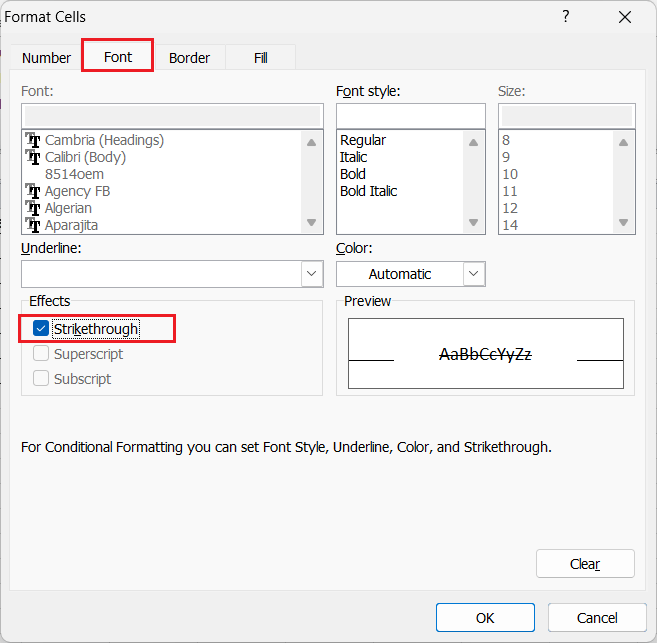
- Lastly, we use the conditional formatting tool to apply strikethrough on cells with completed tasks. For this, we first select cell A2, navigate the Home tab > Conditional Formatting > New Rule, make the following arrangements, and click the OK button twice.

The above image shows that we used the relative reference (E2), not the absolute reference. The preview box shows the text with strikethrough format because we clicked the Format button next to it and selected or checked the ‘Strikethrough‘ option under the Font tab.
- Lastly, we must apply the conditional formatting rule to the remaining cells using the Format Painter We only need to click the Format Painter tool (under the Home tab) and drag the pointer from cell A2 to cell A7. This applies strikethrough on all the cells with completed tasks.
If we now check or uncheck the checkboxes, all the effects or changes will be performed in a real-time.
So, it was all about how inserting and using checkboxes in Excel can help simplify our task and present the data more attractively.


