

Remove spaces in Excel
Often, when you copy the data from external sources and paste it into the Excel sheet, you get some extra space with it. These spaces can be leading, trailing, or in-between spaces. Extra space is a common problem that makes the data unreadable and meaningless.
In Excel, there are three different techniques to remove extra spaces from the Excel data. Excel also offers a TRIM() function to remove spaces from the Excel data. In this chapter, we will describe these methods for removing extra spaces from the data.
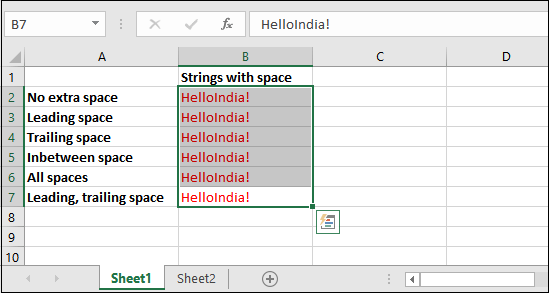
Excel data with spaces
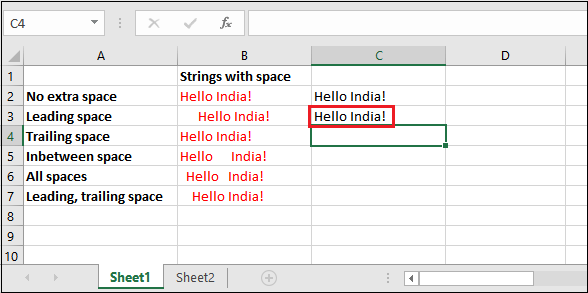
See a few examples of Excel data (for a string Hello World!) having extra and unnecessary spaces.
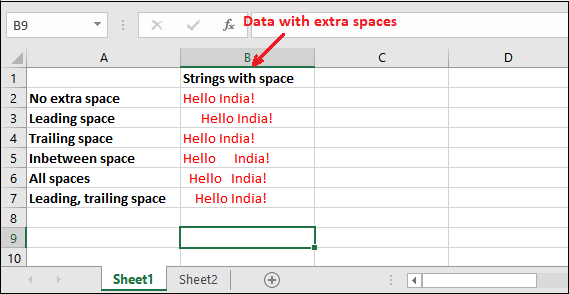
- In the first row, you will see that there is no extra space contained by the data (Hello World!).
- The next row looks OK as the first one. But actually, there are four spaces added at the end of the string. These spaces call trailing spaces, which are not easy to spot.
- Leading spaces are easy to spot as you can also see there are few spaces in third row data.
- In the end, see the space between the words or characters. This is an example of in-between space.
Techniques to remove extra spaces
- Remove spaces using TRIM() function
- Remove spaces with Find and Replace method
- Remove spaces using Power Query
Remove spaces using TRIM() function
Extra space in data is a very common problem. Sometimes, they make the data unreadable and pointless if used in the wrong place. Thus, we have a solution for it.
TRIM() function is a predefined Excel function, which is used to remove the extra spaces from the data. This function is easy to use in Excel. It removes all the extra spaces from the word. These extra spaces can be leading, trailing, or in-between space; it removes all. It finds the extra spaces in words and removes them.
Syntax
Look for an example below:
Example
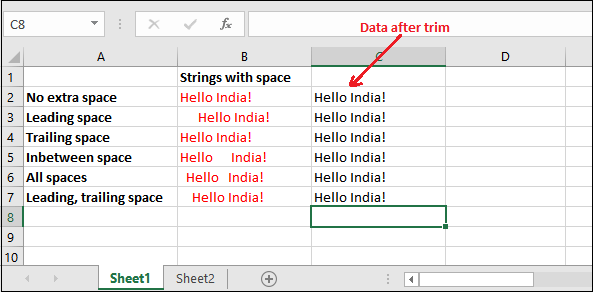
We have an Excel dataset containing some extra spaces.

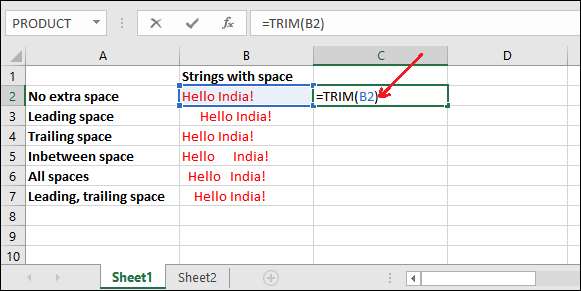
Now, we will use the TRIM() function on each cell of this dataset and remove the extra spaces from them.
Trim B2 Cell
You can see that the B2 cell string does not contain any extra space, as we already mentioned as well for the information.
Execute the following formula for B2 cell to see how it works with the normal string.
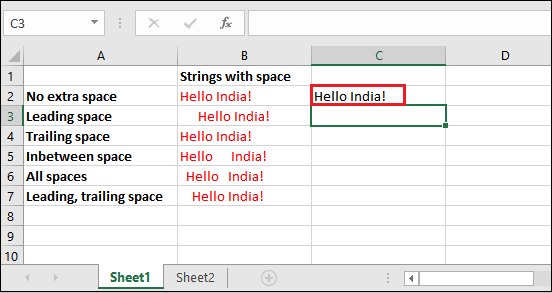
Press the Enter key to get the trimmed result.
Trim B3 Cell
Now, just change the cell number as a parameter value inside the TRIM() function and see the result.
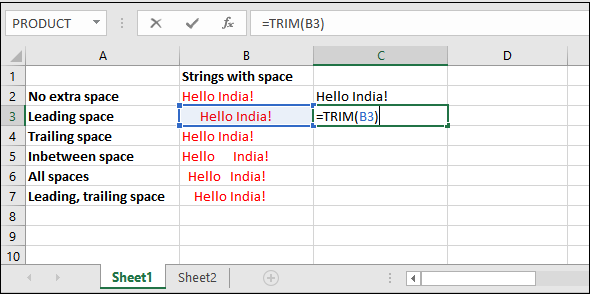
Press the Enter key and get the new string after trimmed.
Similarly, when you perform this TRIM() operation with other cells containing extra spaces. All the extra will be removed and you will get the result same as showing below:
One biggest advantage of using the TRIM() function in Excel is that – it removes only extra spaces from the data instead of all the necessary spaces from them.
Remove spaces using Find and Replace method
There is one more simple way to remove the spaces from the Excel data, i.e., Find and Replace method. By using the Find and Replace feature of Excel, you can easily discover all the spaces and replace them with nothing to remove the spaces from it.
You can replace multiple values at once by selecting a range of cells. The find and replace feature contains two fields: Find what and Replace with.
Find what – In this field, the users need to provide the value for which they are looking to replace.
Replace with – In this field, the users need to enter the value with which they want to replace.
Let’s see with the help of an example how you can use this method to remove the space from your data.
Example,
We have the following dataset in Excel containing some extra spaces.
Step 1: Select a single cell or range of cells from which you want to remove spaces.
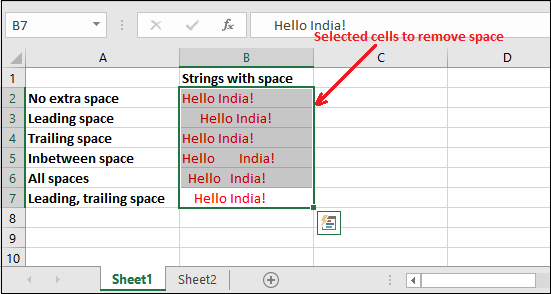
Step 2: Now, press the Ctrl+H shortcut key to directly open the Find & Replace dialogue box.
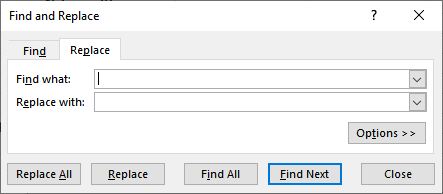
Step 3: Here, provide values in Find what and Replace with field, respectively.
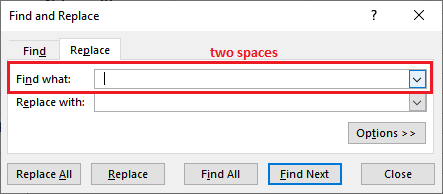
Remove two spaces with one –
a. Navigate to the Find what field and press Spacebar two times on your keyboard to add two space characters.
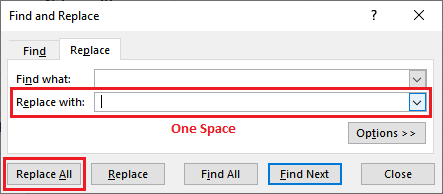
b. Similarly, go to the Replace with field but this time press the Spacebar only once to replace specified two spaces with one and then press Replace All
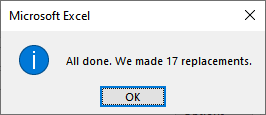
Step 4: When the replacement has been done, a popup dialogue box with a message will show you. Look in the below screenshot, 17 replacements are made.
Press OK and Close the find & replace panel window.
“Repeat this replacement step until all extra spaces does not get replace by one.“
Step 5: After the successful replacement, see that we get the following Excel dataset after removing space as the spaces have been removed from selected cells.

However, you will notice that some extra spaces have also remained. This is because only two spaces are replaced with one. In case if a string is containing more than two spaces, this did not work well.
Remove all spaces –
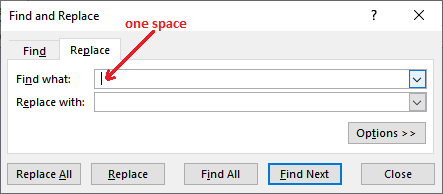
Navigate to the Find what field and enter one space by pressing Spacebar at once on your keyboard.
Next in Replace what field, provide nothing and press Replace for one-by-one replacement while press Replace All button for all replacement at once.

See the below outcome that total 40 replacements have been made.

You can see that all the spaces (leading, trailing, or in-between) have been removed. Data become a single word string with no space.
Problem with Find & Replace method
- This method fails when you only remove the extra spaces, not all.
- Additionally, you will try to remove two spaces with one to resolve this problem, but it also does not work when a string contains more than two spaces.
Solution
In that scenario, we will suggest you to use the TRIM() function that removes all the extra spaces from the string.
Remove extra spaces using Power Query
There is one more way to remove extra spaces from the Excel data, i.e., Power Query Method. This is the last method we are describing to remove spaces from the data hold by Excel cells. It is a bit different technique than the above two methods.
Power query is basically all about data transformation, which is able to handle this kind of task. So, let’s see how power query helps the users to remove extra spaces from data.
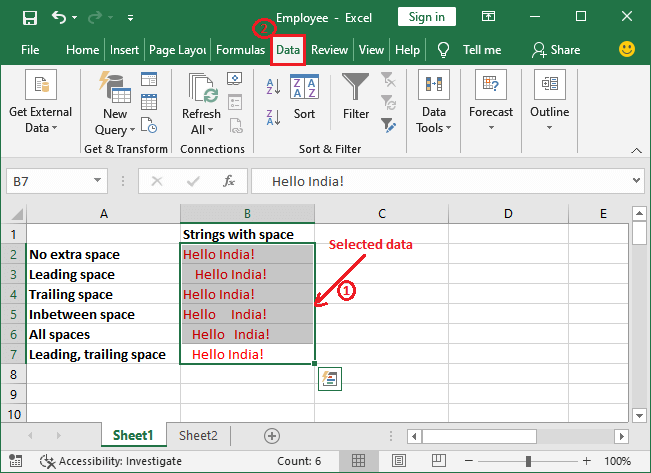
Step 1: Select a range of data and go to the Data tab in your Excel menu bar. We have the same data table that is used in previous examples.
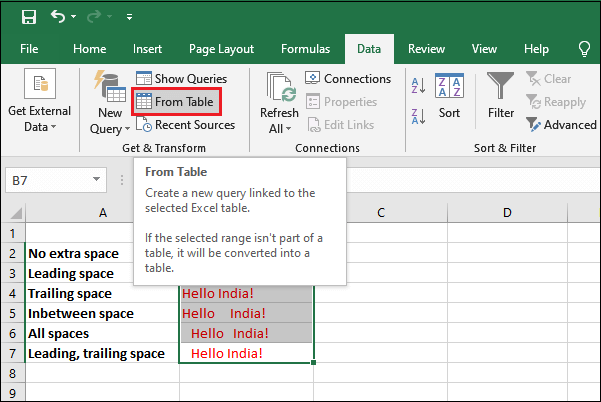
Step 2: Inside the Data ribbon tab, click on the From Table command.
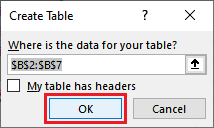
Step 3: A dialogue box will open with the selected range. Click on the OK button here.
Step 4: A power query editor will open and your Excel data will be automatically turned into an Excel table.
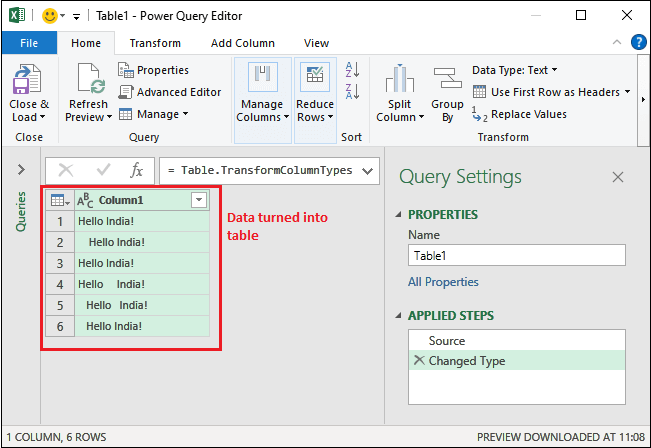
Step 5: Right-click on the table heading and choose Transform and then Trim. Wait, it will not remove the extra spaces yet. You have to follow few more steps.
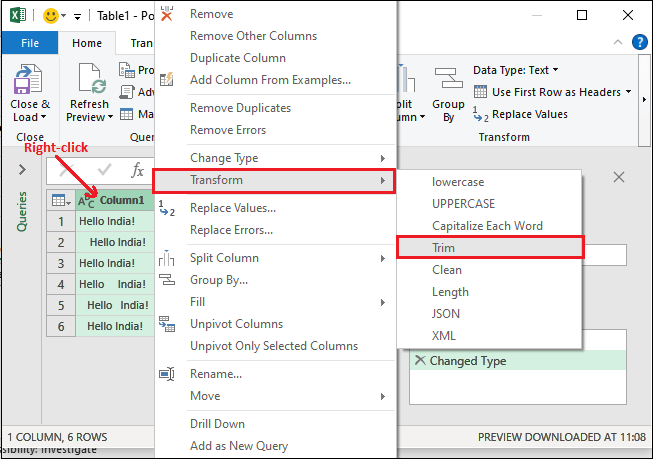
Step 6: You can see that leading and trailing spaces have been removed here, but not in-between spaces.
Now, close the power query editor panel by clicking on the Cross button at the top right corner.
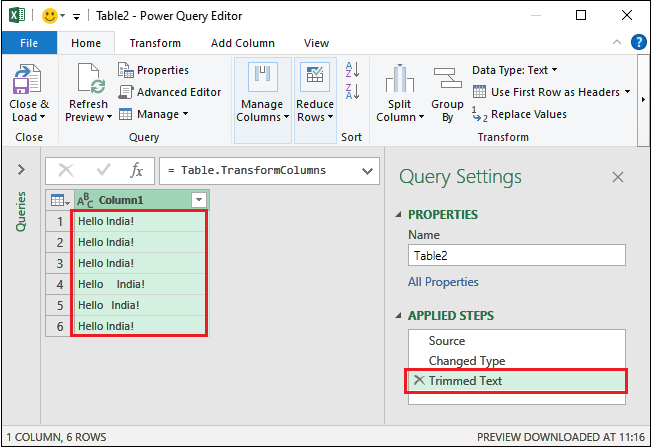
In the right panel, you can also see that the Trimmed text step is showing in the APPLIED STEPS section.
Step 7: A popup will show before closing this window, where click on the Keep button to remain the changes.

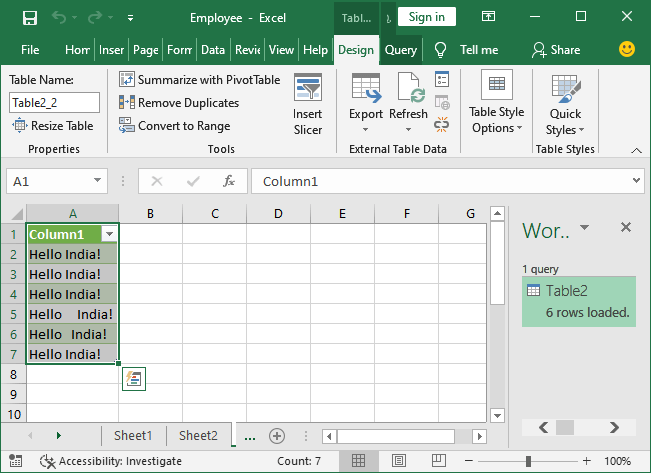
Step 8: See that 6 rows have been loaded and a table with no leading and trailing space will be created and displaying as below:
All three methods are equally useful according to the user’s need. But personally, we will suggest you to use the TRIM() function of Excel to remove the extra spaces.


