

Apply data validation in Excel
Apply data validation on your Excel worksheet to stop the user from entering invalid data into Excel cells. In the previous chapter, we briefed about the data validation, its advantages, types, and all the desired information about the data validation. Now, we will show you how actually the data validations are implemented on an Excel worksheet.
In this chapter, we will discuss each validation step-by-step with an example. Thus, till the end of the chapter, you will have no doubt. Topics that we are going to be covered in this chapter are –
- Data validation type
- Apply number validation on a column
- Dropdown list validation on a column
- Create and apply custom validation
- Find cells with validation
- Copy validation from one column to another column
- Clear all validations
Data validation types
Following are the three categories of validation that every Excel user uses in their Excel sheet. For the detailed information, go through with our previous chapter (Data Validation in Excel).
- Predefined data validation (Number, Decimal, Text length, date, and time validation)
- Dropdown list data validation (List validation)
- Custom data validation (User-defined validation)
Although there are various other validations that a user needs, it comes under predefined data validation, such as – Number, Text, length, date, and time validations. We will describe one validation of each type.
Apply number Validation on a column
We will take an Excel worksheet and put the Number validation in one of its columns to restrict the input. Here, we have the following steps to apply number validation on a column in an Excel worksheet.
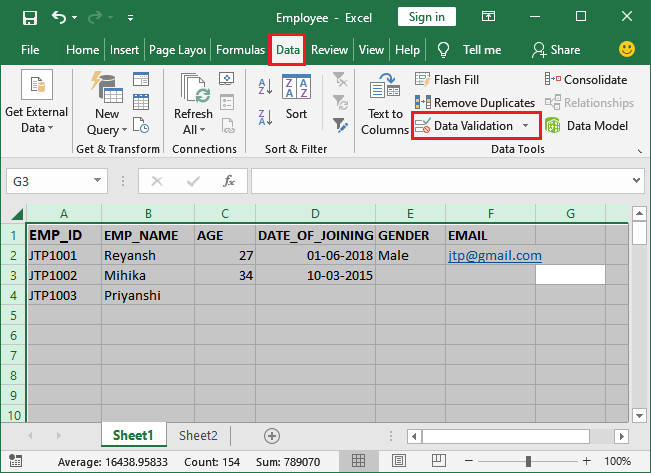
Step 1: Open an Excel sheet and define the names of columns to indicate the users to enter the data in them.
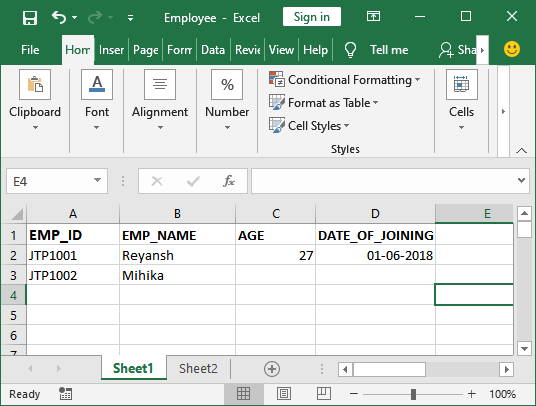
Step 2: Now, select one column on which you would like to apply number validation. E.g., Age column.
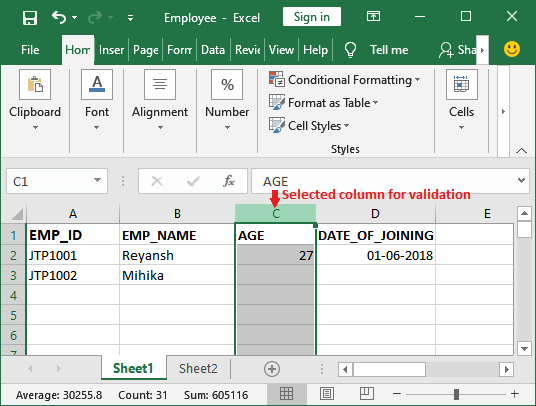
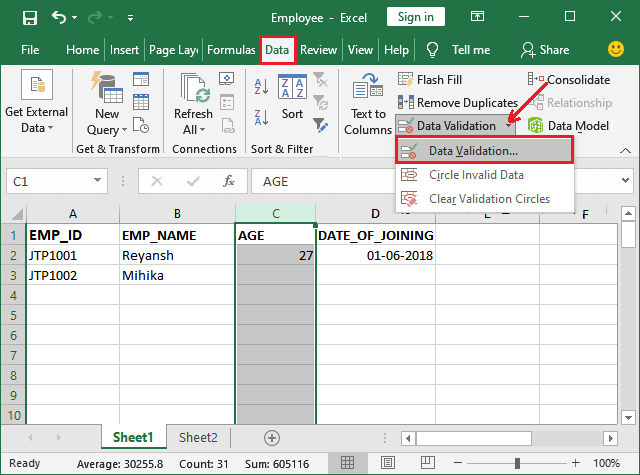
Step 3: Navigate to the Data tab in the Excel menu bar and click on the Data Validation under the Data tools.
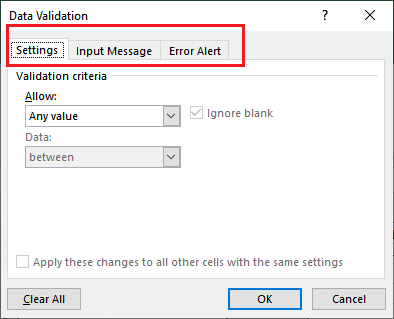
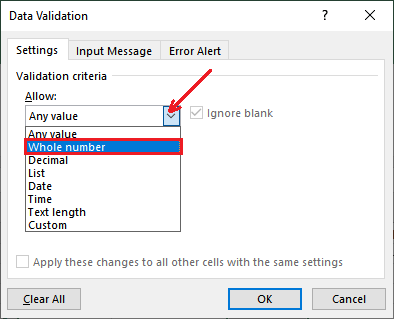
Step 4: A default data validation panel will open, where you will see three tabs, i.e., Settings, Input Message, and Error Alert.
Step 5: In the Setting tab, select a validation from the Allows dropdown list. We will choose the Whole number that will enable few more settings on the panel.
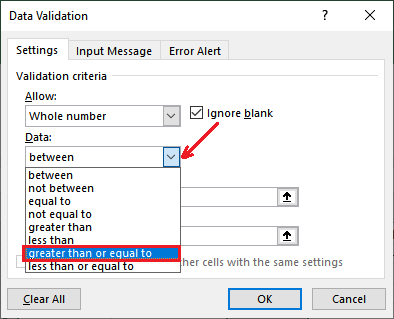
Step 6: Now, choose one of the conditions from the Data dropdown list. For example, if you select greater than or equal to condition, you have to enter one more information with it.
Step 7: Define the minimum value in the respective field for the greater than condition.
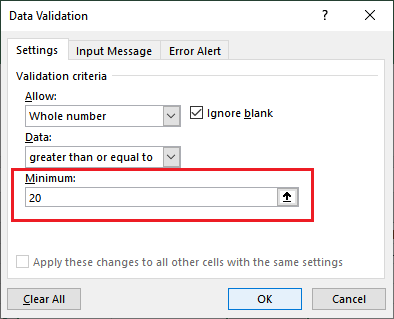
According to this condition, the value entered by the user in the validated column must be greater than or equal to 20. It means the minimum age of an employee must be 20.
Note: Don’t press the OK button yet.
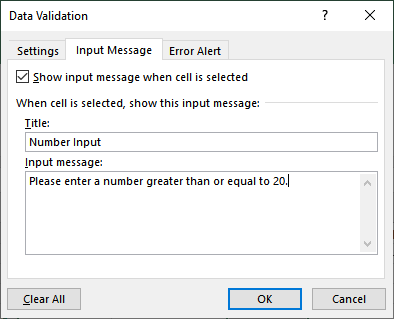
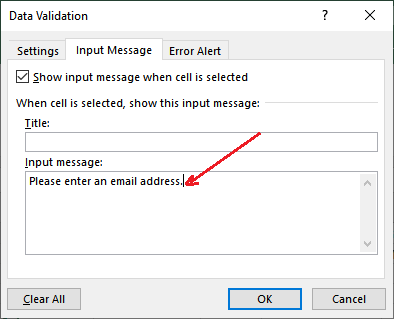
Set an Input Message
Step 8: Navigate to the Input Message tab just next to the Setting tab.
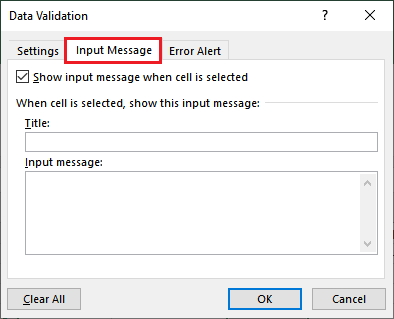
Step 9: Provide a title and a custom message here that will display while selected validated cell.
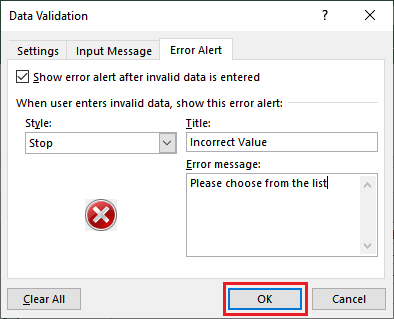
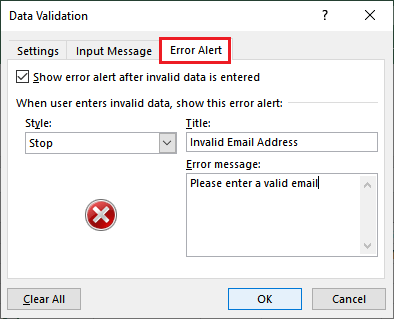
Set an Error Alert
Step 10: The last step is – navigate to the Error Alert tab. Choose one of the Style from the list, either Stop, Warning, or Information.
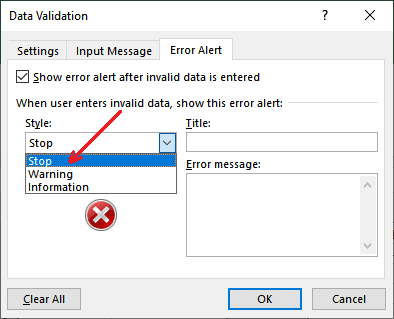
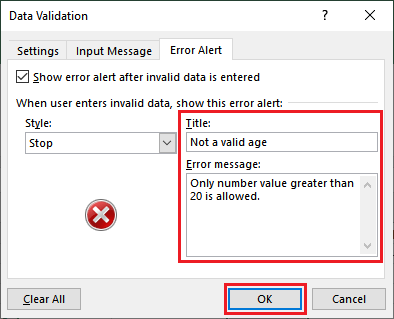
Step 11: Now, enter the title and alert message in the respective fields to show an alert when a user enters the wrong value.
Everything is set up successfully; click the OK button to save all the changes.
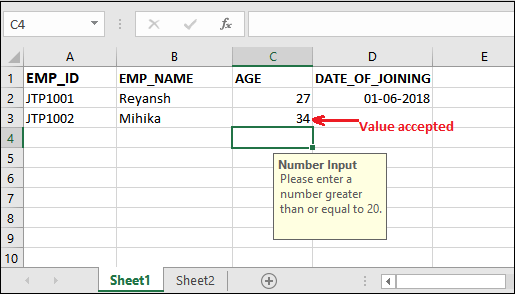
Number validation is applied to the age column successfully. Enter some data to the validated column and check the validation.
Output 1: Input Messages
When the user selects the cell with validation, Excel displays a message that is set while putting validation on the cell. This message contains what type of value you can enter in the validation column.
See the following output:

Output 2: Correct Input
When a user provides correct input in the validated column and presses the Enter key, no error occurs and data is accepted successfully. You will get the output as showing below:
Output 3: Alert Message
The last output is an alert message. It shows when the user enters an incorrect value in the validated cell and presses the Enter key. See the output on entering a wrong value.
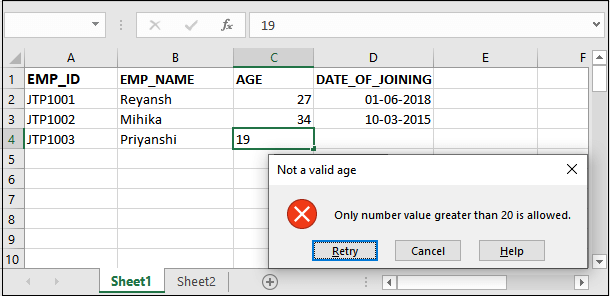
Here, either Retry or enter the value again in the same cell or Cancel the current input.
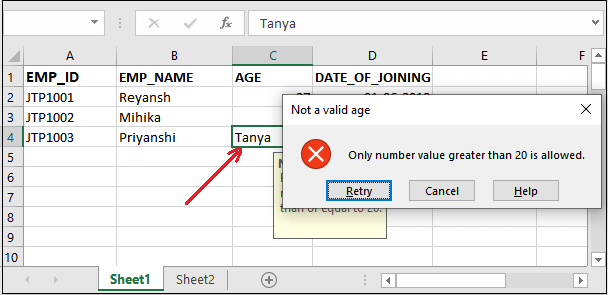
Output on entering wrong data type
Despite the Input message, if you also try to enter text input in number validated field, value is not acceptable by the cell and it will show the alert message to you.
Hence, all the validations work in the same ways. But the way and place of use are different.
Dropdown list validation on a column
This method of putting validation on a column is totally different than all the other validation. You will see how it is different when we will show you.
It is an input validation that presents predefined choices to the users to provide the input to an Excel worksheet. Hence, you have the only option to provide input to an Excel cell is to choose input value from the dropdown list.
Here, we have the following steps to apply list validation on a column in an Excel worksheet.
Steps to create list validation
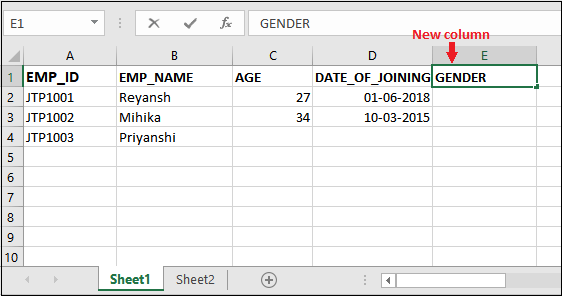
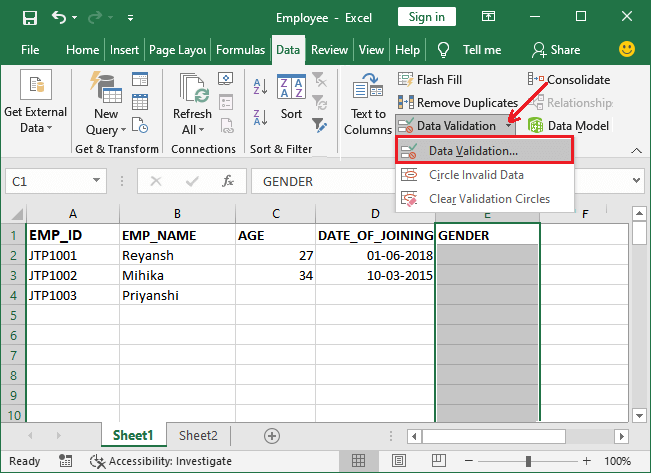
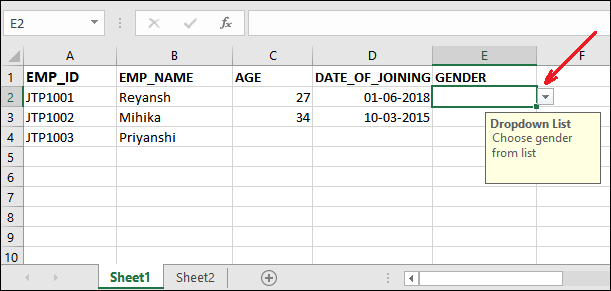
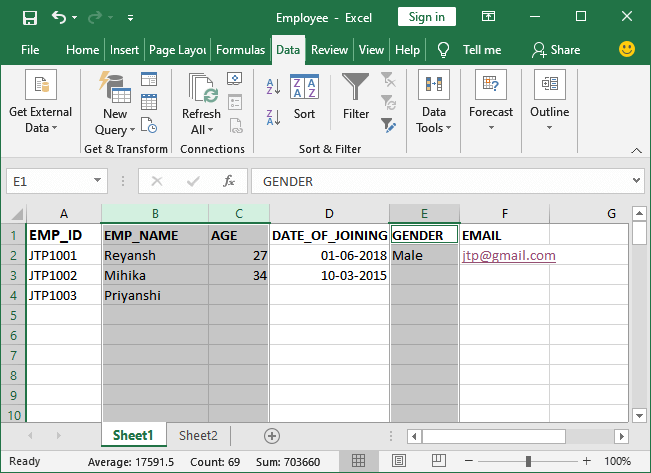
We have added one more column (Gender) to the previously used Excel sheet to define this validation.
Step 1: Select this Gender column and navigate to the Data tab in the menu bar.
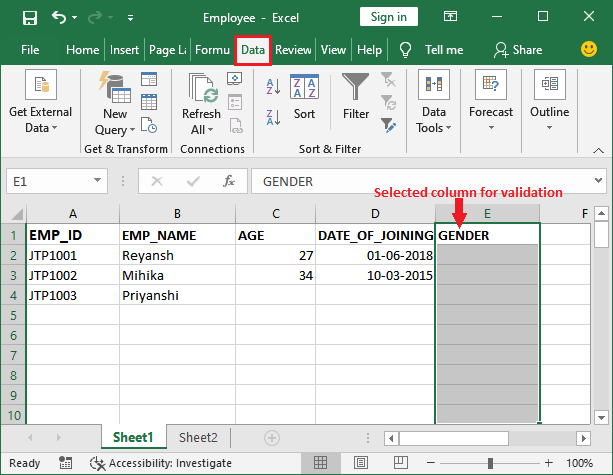
Step 2: Here, click on the Data Validation under the Data tools section.
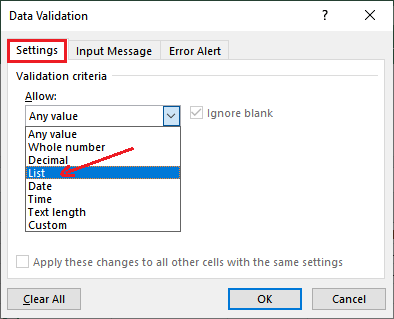
Step 3: In the setting tab, click on the Allow dropdown button and choose List from it to create a dropdown list for the gender column.
Step 4: In the same setting tab, provide the values separated by commas in the Source field. These values will display next to each cell of the validated column.

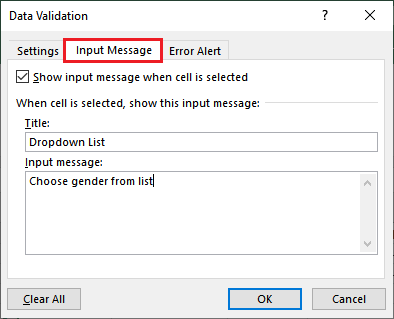
Step 5: Now, if you want to provide any input message, move to the respective tab and enter a custom message here.
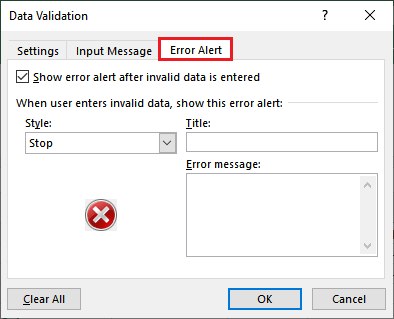
Step 6: Similarly for the Stop, Warning, or Information alert on wrong input, navigate to the Alert tab in the data validation panel.
Step 7: Make all the steps done and click the OK button to complete the list creation/validation process.
A dropdown list is created for each cell input of the gender column. Hence, the column is validated.
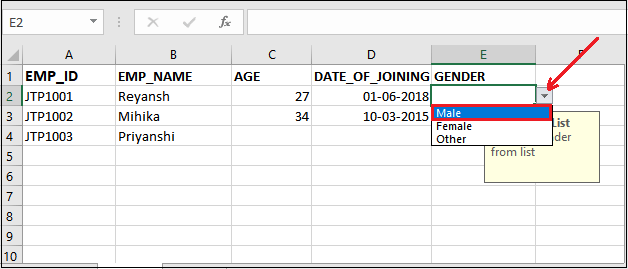
Step 8: See the below output of how a dropdown button is added next to the validated cell, which enables when the cell is selected.
Step 9: Click on the dropdown list and choose the correct gender from the list to provide the input in the gender field.
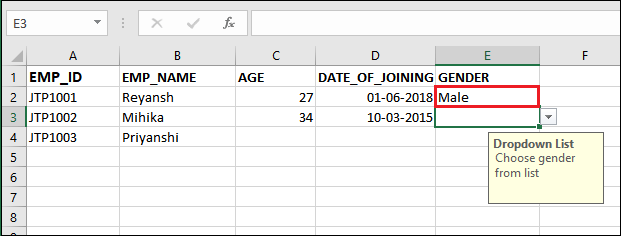
Step 10: See that value is entered without any interruption.
Create and apply custom Validation
Besides all these built-in validation rules, you can also set your custom validations using your own formulas. These custom validations allow the users to define their own validation, which is not available in the predefined validation list.
Custom validation enables the users to write their own formulas to validate the data. Thus, it requires a formula to be entered by the creator. For example, custom validation to validate the email address.
Steps to create custom Validation
Here, we have the following steps to create custom validation and apply them on a column of Excel worksheet. Before creating email custom validation, we will add an email column to the previously used Excel worksheet.
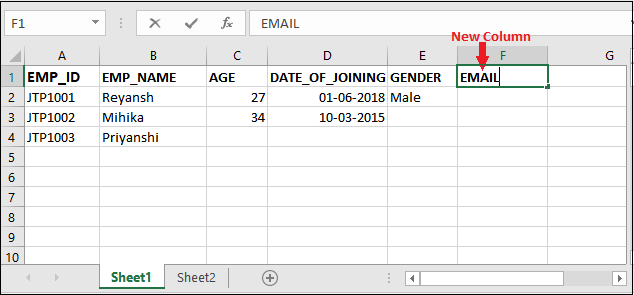
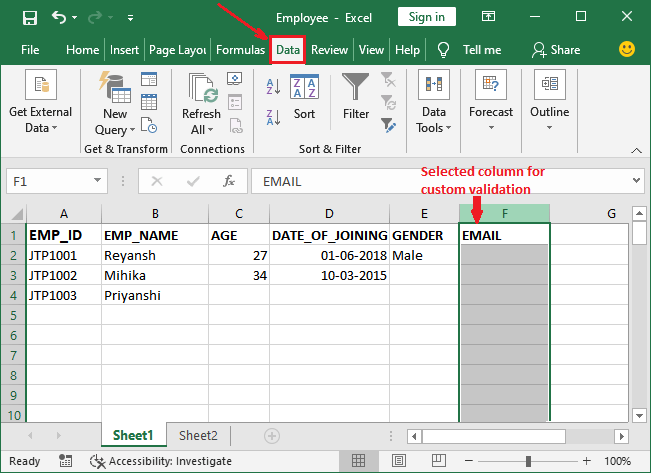
Step 1: You open your Excel sheet in which you want to define custom validation. Select a column for applying the custom validation and navigate to the Data tab.
Step 2: Here, click on the Data Validation under the Data tools section.
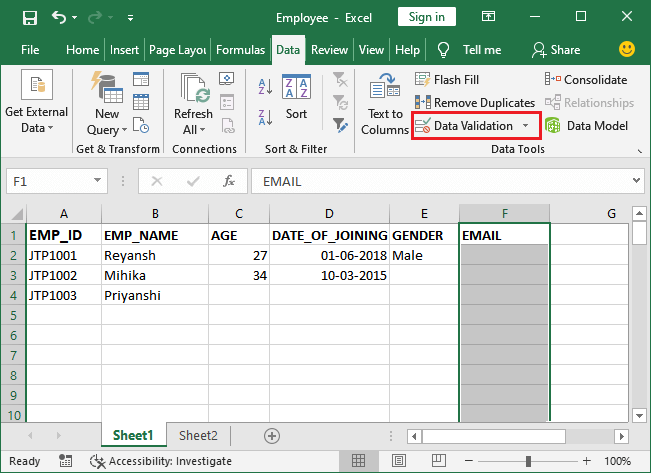
Step 3: In the setting tab, click on the Allow dropdown button and choose Custom from the list to define custom validation.

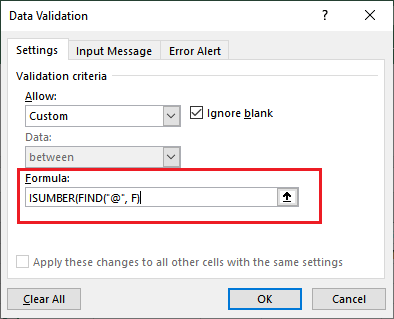
When you select Custom from the list, it will enable one more field (Formula) to define your own formula.
Step 4: Here, Enter the formula in the Formula field to create a custom condition. As we are creating email validation, write the following formula for it:
Step 5: Now, similar to the other predefined validations, navigate to the Input message tab to give a pre-input instruction to the users before entering the data into the cell.
We have only provided input message here, not the title.
Step 6: Go to the last Error Alert tab and same define the alert message here.
Custom email validation has been created successfully and applied on column F (Email) in the Excel worksheet.
Output 1: Invalid Email
When the user enters an invalid (without @ sign) email address and presses the Enter key. Email is not accepted by validated Excel cell and an error alert displays.
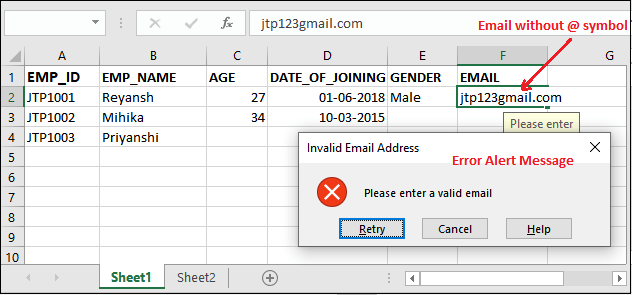
Click on the Retry button to re-enter the email address to the F2 cell.
Output 2: Valid Email
Now, enter a valid email address along with @ symbol, and see the outcome. Email is now accepted by validated Excel cell and no error alert popup displays.
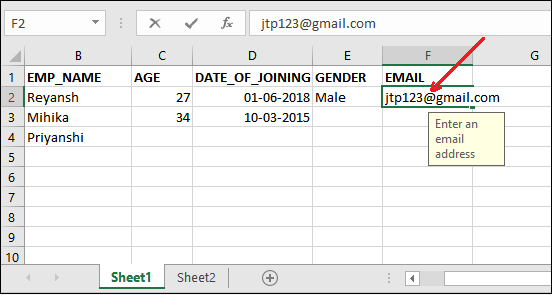
See that the email has been accepted by the validated Excel cell.
Find cells with validation
Often, when we do not pass the Input message and alert message to the validated cells, they do not interpret whether the cell is validated or not. In that case, a problem arises to find the cells with validation.
Excel enables a feature for the users to find all the cells having validations with the help of GO TO. It will highlight all the validated cells and columns.
Below are some simple steps to get know all the validated cells in the Excel worksheet:
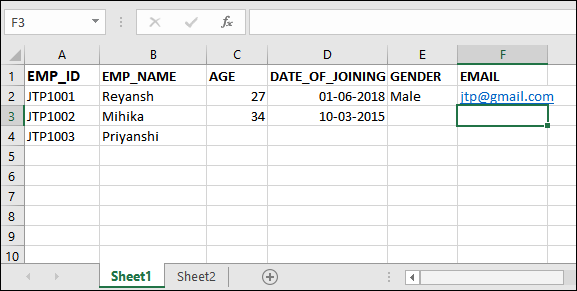
Step 1: Open your Excel worksheet for which you want to find validated cells.
We have this worksheet with some validations.

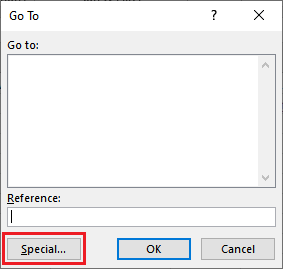
Step 2: Press the Ctrl+G (shortcut key for Go To) to open the Go To panel, where click on the Special button present at the bottom left corner.
Step 3: In Go To Special, mark the Data Validation radio button in the list.
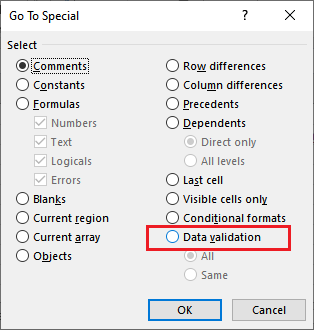
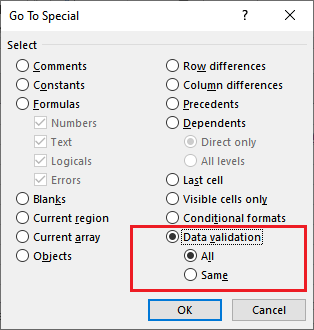
Leave All under the Data Validation radio button as marked to see all validations and click the OK button now.
Step 4: Look in the below Excel screenshot that all the cells/columns highlighted with grey color are validated cells.
See that the column B (EMP_NAME), C (AGE), and E (GENDER) has been highlighted. It means these are the column on which certain validations are applied.
Hence, this is the way to find the cells with validation in an Excel worksheet.
Copy validation from one column to another column
Several times, we need the same validation to be put on more than one column. In that case, it is good to copy the validation from one column to another rather than putting it separately on each column.
Copying the validation saves the time of users to put it on each column individually. It is not so complex to copy the validation. It just two steps simple process of copy and special paste.
Now, we will show you with the help of an example how you can do it with your Excel sheet.
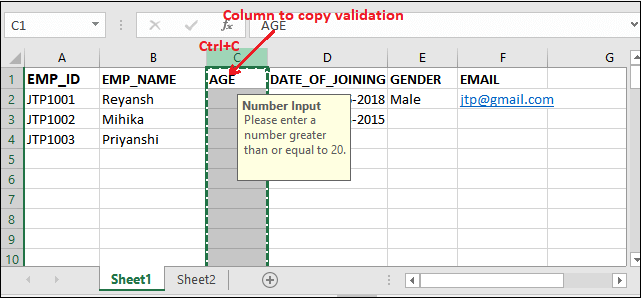
Step 1: We have the following excel datasheet. In this example, we will copy age column validation.
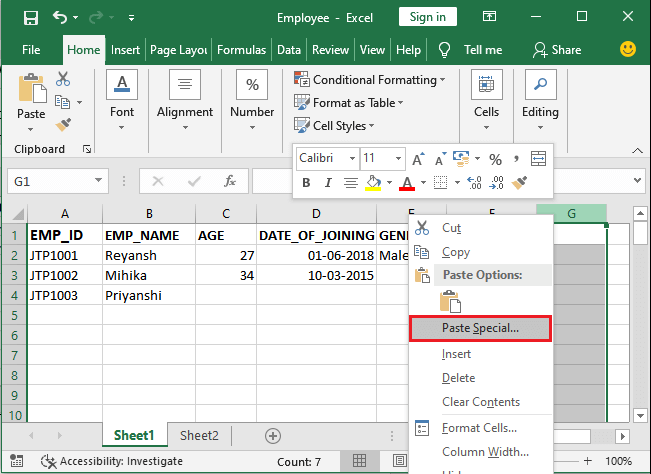
Step 2: Select the column/cell whose validation you want to copy and press the Ctrl+C shortcut key of copy.
Note: “Do not simply paste using Ctrl+P that only paste the data, not validation. This time you have to use Paste Special option of Excel to copy-paste the validation.”
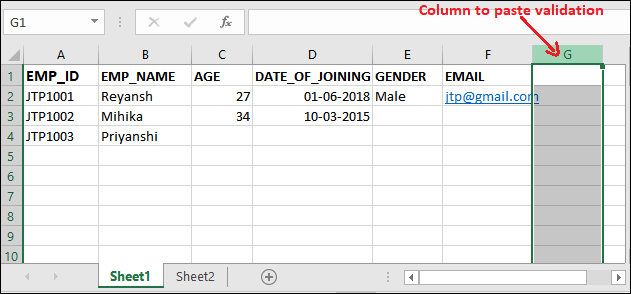
Step 3: Now, go to the column where you want to paste the validation. Here, if you select a single cell, validation will apply only to that cell. If you select the whole column, validation will paste on all cells of the selected column.
Step 4: Right-click on the selected column and click on the Paste Special option here.
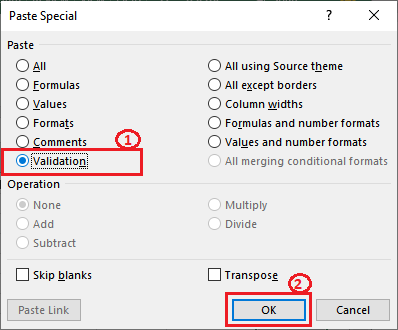
Step 5: A paste special dialogue box will open, where mark the Validation radio button and click the OK button to complete the action.
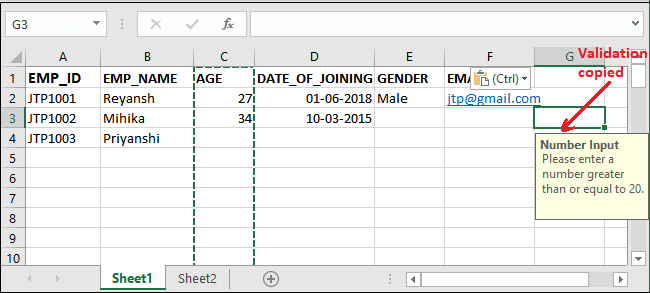
Validation is now copied from one column to another column. You can see by yourself that validation has been copied.
Now, this time to learn how one can remove all these validations applied on an Excel sheet.
Clear validation from Excel worksheet
Often, we apply wrong validation to any column. In that scenario, we need to remove that validation from that column. Excel allows the users to clear the validation from the validated column or cells.
You can remove all validations from the entire worksheet or from one column individually. It is totally up to you. Steps are completely same for both. The only difference is – select the entire worksheet for clearing all validations from the entire worksheet or select only a particular column to remove validation only from one column.
Steps to clear validations
We have a few simple steps to clear the validations from the Excel worksheet.
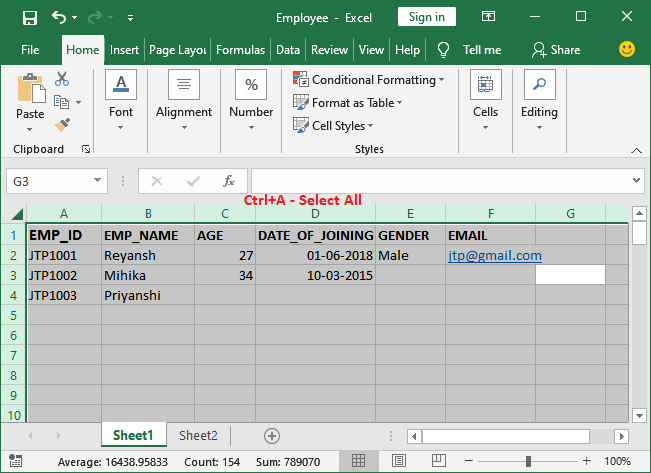
Step 1: Select the range of cells or all cells from which you want to remove validation.
We have selected all cells (entire worksheet).
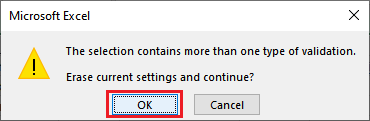
Step 2: Go to Data tab > Data Tools > Data Validation.
Step 3: It may ask for the following message, ignore the message and just click on the OK.
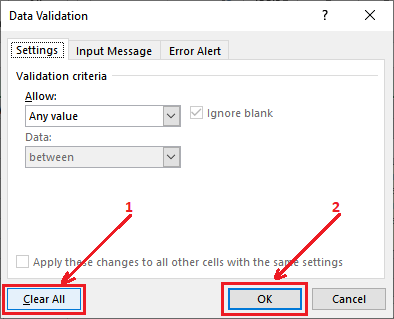
Step 4: A data validation tab will open, where click on the Clear All button and then the OK button.
Step 5: All validations applied on the selected cells have been removed successfully and your validated become normal Excel sheet with no validation.


