

Text Alignment in Excel
MS Excel or Microsoft Excel is currently a powerful and efficient spreadsheet software with various features or tools. It allows users to record values within cells generated by the intersected rows and columns. We can enter values using text, numbers, symbols, and/ or other data types and apply desired functions when necessary. Excel also allows us to manage the formatting and styles of data within cells.

Since we can record values using text, Excel also allows us to adjust text alignment within cells. This article discusses Excel’s various text alignment options and a step-by-step tutorial to use the desired alignment option. Before we discuss the text alignment options and how to use them, let us understand the text alignment feature in a brief introduction.
What is Text Alignment in Excel?
Text alignment is a word processing software feature that helps users to align text within worksheet cells. It enables the composition of text documents with various text positions or alignments on one or more cells within the Excel document. The text alignment feature mainly places the cursor or aligns the text along the various margins of the document.
What are the alignment options in Excel?
If we do not want to use the default alignments in an Excel cell, we can make changes in the alignments of the cell. There are following two ways to adjust text alignments in Excel:
- Horizontal Alignment
- Vertical Alignment
Let us now discuss both in detail:
Horizontal Alignment
The horizontal alignment tools allow users to adjust the text alignments in a horizontal axis, such as left, right, center, etc.
- Left: Clicking the left alignment button aligns the given or typed contents in the left position within the selected cell (s).
- Center: Clicking the center alignment button aligns the given contents to the center position.
- Right: Clicking the right alignment button aligns the given contents in the right position within the selected cell (s).
- Fill: Clicking the fill option repeats the cell’s contents until the cell’s width is filled.
- Justify: Clicking the justify button justifies the cell contents to the left and right sides equally in the horizontal axis. This alignment option is useful only when the corresponding cell (s) is formatted using the wrapped text option, and the cell’s contents are separated into multiple rows.
Vertical Alignment
The vertical alignment tools allow users to adjust the text alignments vertically, such as the top, middle, bottom, etc.
- Top: Clicking the top alignment button aligns the recorded contents to the top position within the selected cell (s).
- Center: Clicking the center alignment button aligns the given contents to the center position, vertically, within the selected cell.
- Bottom: Clicking the bottom alignment button aligns the given contents to the bottom position within the selected cell.
- Justify: Clicking the justify button justifies the cell contents vertically within the cell. This alignment option is useful only when the corresponding cell (s) is formatted using the wrapped text option, and the cell’s contents are separated into multiple rows.
Aligning Text in Excel
As we discussed above, Excel allows us to align text horizontally and vertically. Similarly, we have several methods to implement the desired text alignment in Excel cells. We can easily change the default alignment using the Ribbon Tools, Format Cells dialog box, or keyboard shortcuts.
- Change Text Alignments from Ribbon
- Change Text Alignments from Format Cells
- Change Text Alignments using Shortcut Keys
Let us now discuss the above methods in detail:
Change Text Alignments from Ribbon
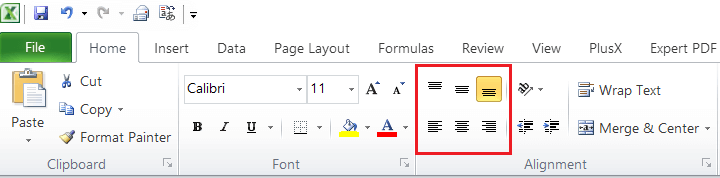
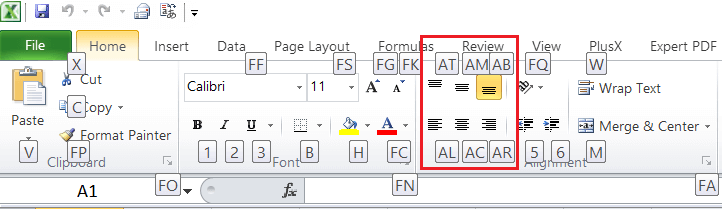
The easiest and straightforward way to access text alignment options in Excel is to use ribbon tools. Both horizontal and vertical alignment options can be accessed by going to the Home tab and using the alignments from the Alignment group.
By default, Excel automatically aligns entered text contents to the left position of the cell and numbers to the right position. We can use alignment options from the Alignment group and change them accordingly.
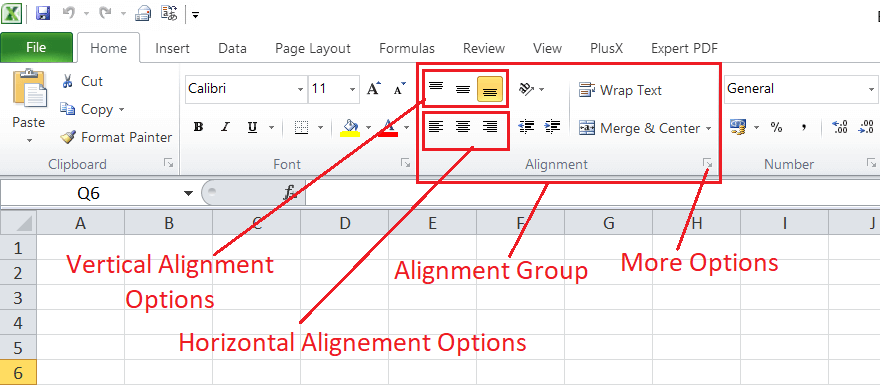
- We can click the tools from the vertical alignment options and pick Top Align, Middle Align, or Bottom Align, respectively.
- We can click the tools from the horizontal alignment options and pick Left Align, Center Align, or Right Align, respectively.
- We can click the ‘More Options’ button to access the Format Cells dialogue box with the Alignment and other formatting options.
Change Text Alignments from Format Cells
The Format Cells dialogue box is another efficient way to change text alignments in Excel cells. According to this method, we need to perform the following steps:
- First, we need to select the cells on which we want to align texts.
- Next, we need to open a Format Cells dialogue box. We can launch a dialogue box by clicking the arrow at the bottom right corner of the Alignment group under the Home tab.
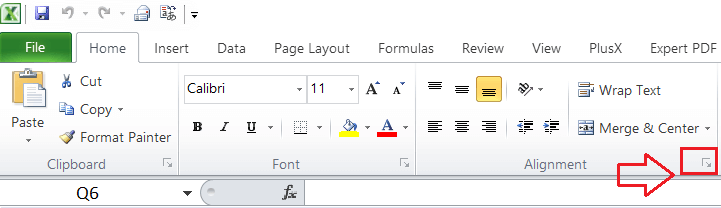

Alternately, we can press the keyboard shortcut keys combination ‘Ctrl + 1’ to open the Format Cells dialogue box. - In the Format Cells dialogue box, we must select the ‘Alignment’ tab and choose the desired option from the Horizontal and Vertical drop-down lists. The Horizontal drop-down list contains the following alignments:
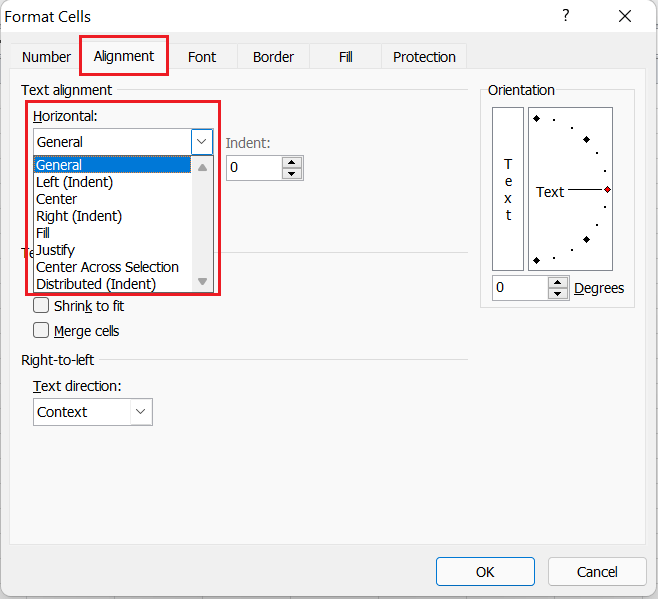
The Horizontal drop-down list contains the following alignments:
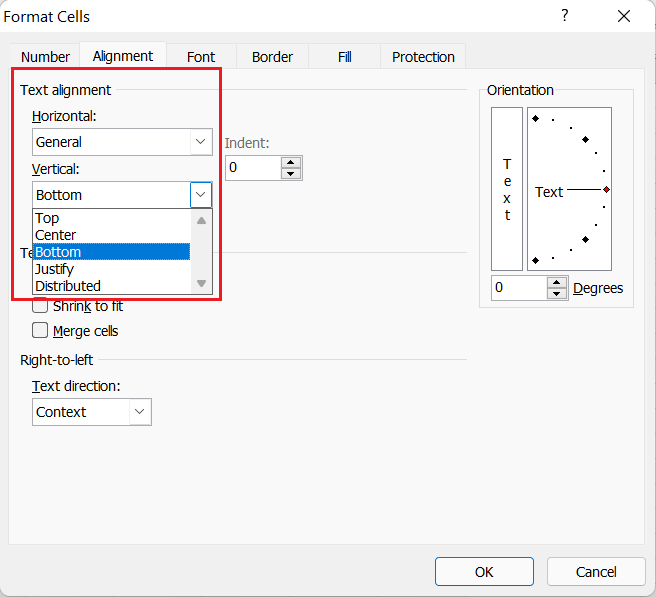
- Lastly, we must check the preview box and click the OK button to apply the selected alignment style.
Change Text Alignments using Shortcut Keys
Excel allows users to use keyboard shortcuts for most of the Excel features or operations. Likewise, we can also align text using the keyboard buttons without lifting our fingers off the keyboard. The following table consists of handy keyboard shortcuts for text alignment in Excel:
| Action | Shortcut Key |
|---|---|
| Top Alignment | Alt + H + A + T |
| Middle (Center) Alignment – Vertically | Alt + H + A + M |
| Bottom Alignment | Alt + H + A+ B |
| Left Alignment | Alt + H + A + L |
| Middle (Center) Alignment – Horizontally | Alt + H + A + C |
| Right Alignment | Alt + H + A + R |
Since Excel has many keyboard shortcuts, it is not easy to remember alignment shortcut keys. However, there is a simple way to memorize all the shortcuts displayed in the above table. The first key, ‘Alt’, activates quick shortcuts in Excel. Once we activate the quick shortcuts by pressing the Alt key, Excel displays specific keys to use the displayed options within the Excel window.
The first key combination, ‘Alt + H’, allows us to access the Home tab, while the second part of keys (the remaining keys) activates the desired alignment option. For instance, after pressing the ‘Alt + H’, ‘Alt + T’ denotes ‘align top’, ‘Alt + B’ denotes ‘align bottom’, ‘Alt + L’ denotes ‘align left’ and so on.
Text Alignment Examples
We can select the cells to align and use the above methods to align text within the cells.
The example of the horizontal alignments can be seen in the following sheet:
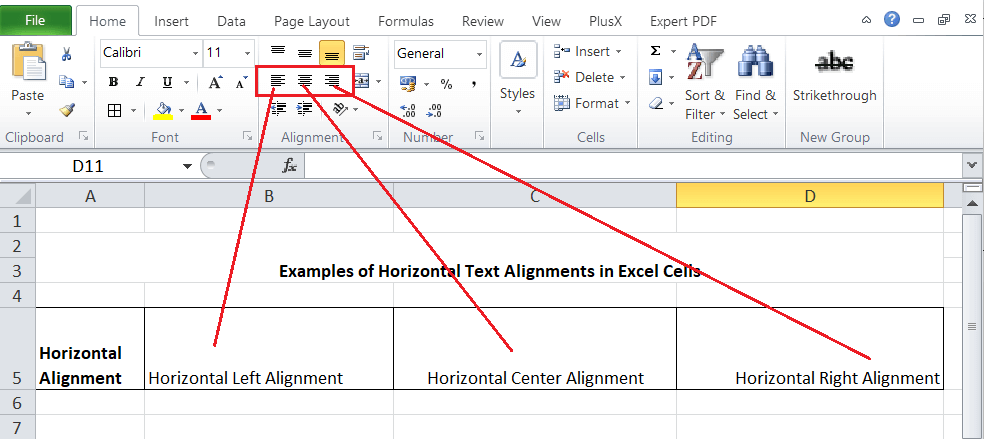
The recorded text is shifted to left, center, and right positions in the above image.
The example of the vertical alignments can be seen in the following sheet:

The recorded text is shifted to the top, middle, and bottom positions in the above image.
Undo the Alignments
There are two ways that we can use to undo the alignments changes within the sheet, such as:
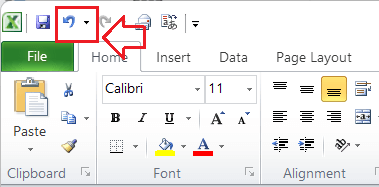
- We can use the Undo feature in Excel to remove alignment changes just after applying them. The shortcut to use Undo in Excel is Ctrl + Z.
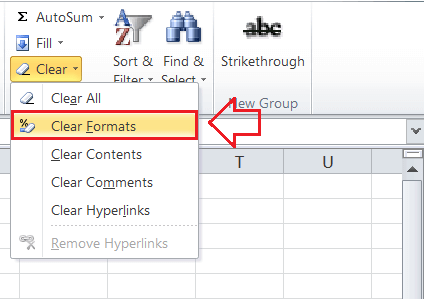
- To remove the alignment changes later, we need to select the specific cell or cell range and navigate to Home > Clear > ClearFormats from the Editing group.
Important Points to Remember
- If we have a long paragraph or a long line of text in continuous cells in a spreadsheet, we might not see the entire text at once. We can fix it and view the entire text within the cell by clicking the Wrap Text option under the Home tab in a group named Alignment, and it typically wraps the text without changing the column width.
- If we want to merge multiple cells and center texts spanning multiple rows and columns, we need to click the Merge & Center button in a group named Alignment under the Home tab.
- The Orientation option allows us to make text vertical, rotate text up and down to 90 degrees and turn text to 45 degrees. This option typically rotates text to a diagonal angle or vertical orientation.


