Removing Of Unwanted Rows In Excel
Blank rows between the data can turn your day into nightmare. They certainly lose a lot of your precious time. If there are only a few rows then you can delete them manually. Worse when there are hundreds of blanks. Then this article brings help. Sometimes it may happen that you want to remove all empty row with just few clicks. How to do it in Excel?
You want to delete blank lines inside your table. An example table is in the image below.

To get rid of blank rows in Excel:
1. Select whole table (with headers)

2. Press the F5 function key. In the window that appears select Special…
You can also go to Ribbon > Home section.
Click Find & Select > Go to Special…

3. In the next window tick Blanks
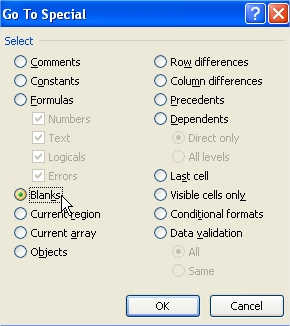
4. Confirm by clicking OK and blank rows will be highlighted

5 Click on one of them, right-click and choose Delete…
The same in Ribbon > Home tab > Cells section.
Click Delete > Delete Sheet Rows.
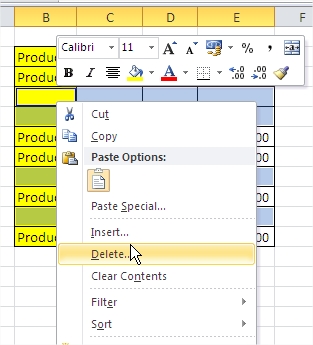
6. In the next window choose Entire row.
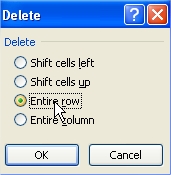
7. Confirm OK and be happy.

Blank lines are gone! Your table was cleared in a few seconds! This trick just saved a lot of time. Excel is powerful when you know such tricks.
Template
Further reading:
Basic concepts
Getting started with Excel
Cell References


